|
History
The
SBD-3 was originally ordered by the French, but following the overturn by
Germany all 174 of their order, plus an additional 410 SBD-3’s were
delivered to the U.S. Navy. These SBD’s unlike earlier models SBD-1 &
SBD-2 were more up to combat standard. The SBD-3 had better armour for its
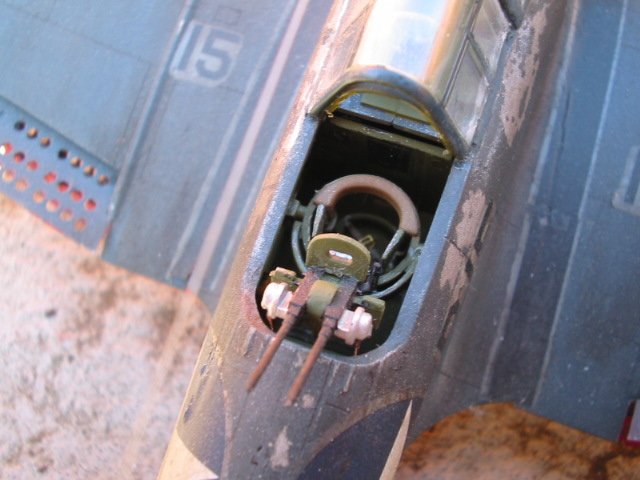
two-crew members as well as self-sealing fuel tanks. They had twin .30 cal.
flexible machine guns in the rear gunner’s compartment, and two .50 machine
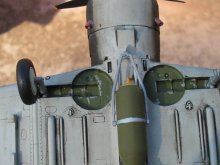
guns in the nose cowl. The SBD-3 could carry a 1,200 lb bomb on its centreline
cradle plus a 100 lb bomb on each wing. The slow but deadly Dauntless sank more
shipping during World War II than all other aircraft combined.
|
Click on
images below to see larger images
|
|

|
 |
|
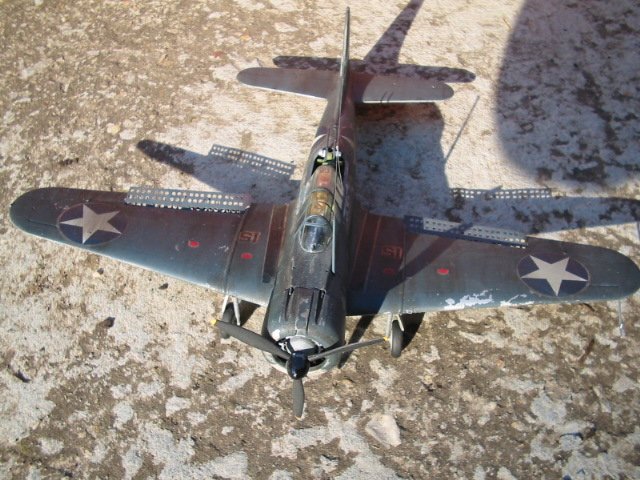
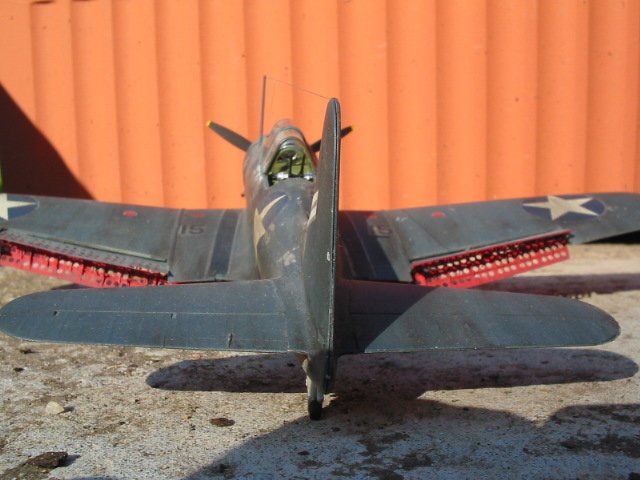
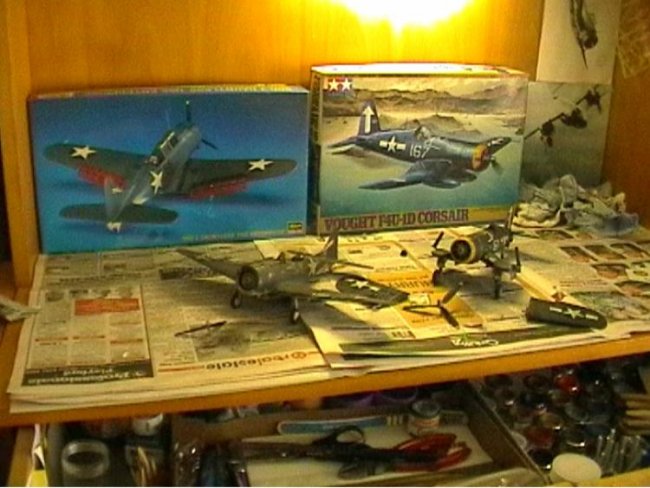
The Model
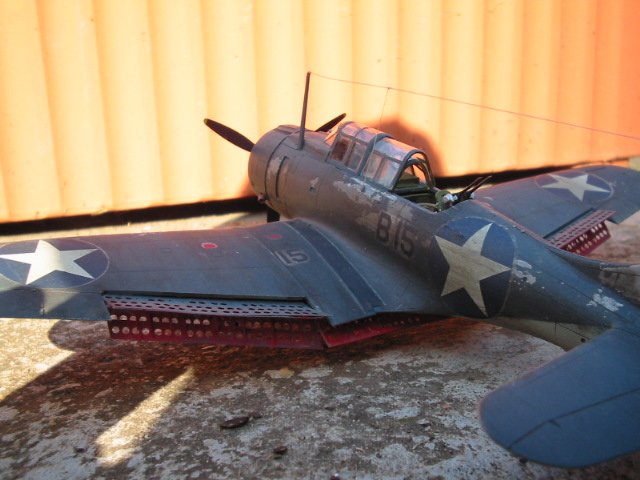
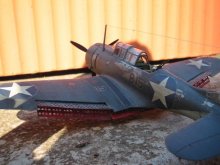
This
model was built OOB apart from seat belts made up of masking tape and the
antenna wire using that of the sprue. This particular model was built to
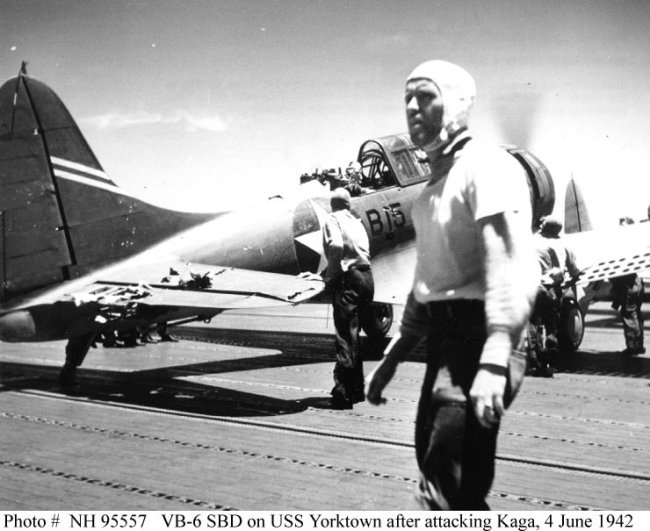
represent that of belonging to the USS Yorktown and is the same as the one in
the picture at the bottom of the page (No 15).
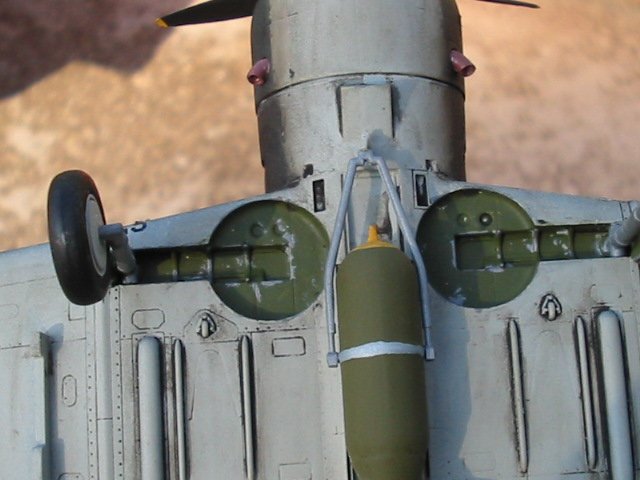
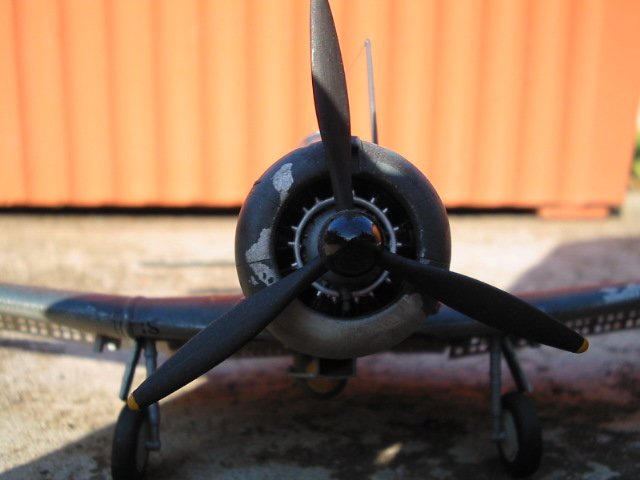
Hasegawa has constructed a reasonable model with a great fuselage that
has plenty of detail. The model also comes with etched dive brake flaps and
bullet belt for the rear guns. The cockpit has some grate detail as well, and
comes with optional decals for the control panel. The engine of that which
represents the P&W R-820-52 is also well detailed, with the cowling on. If
you want to display this particular model with out the cowling then you will
need to get hold of a more detailed engine.
Construction
The
model went together reasonable well however there was the need to use filler as
well as some sanding. In order to put the dive brakes in their up position,
there is some sawing to be done the modeller will have to cut out the dive
brakes that are already moulded to the wings in the close position, but Hasegawa
has thought of allocating a little saw in order to accomplish the job. However
Hasegawa has given the modeller some very tedious work to do with constructing
the dive brakes. Personally if I had known just how tedious I might not have
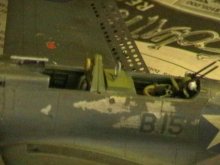
bothered to have them displayed in the up position. The other problem I faced
with was that of the cockpit windows, Hasegawa thought of the little saw but
didn’t put much thought into how the modeller could display the cockpit and
rear gunner windows in the open position. The problem being that the four
windows will not fit over one an other on the centre of the fuselage were they
would be sitting if both the pilot and rear gunner compartments were opened.
After I surveyed the situation I decided to only display the rear gunners
compartment opened that was enough work just to do that, A lot of filing has to
be done to the cockpit windows if the modeller wish’s to have them
opened.
|
Click on
images below to see larger images
|
|
|
 |

|
Painting
and finish
For
the colours I used Humbrol Metal cote No 27001and on top of that I used Humbrol
gloss clear No 35 for the actual colour I used Humbrol Navy No 77 for the top of
the fuselage and Humbrol Sea Grey No 129 for the belly. After spraying the top
of the fuselage with the metal cote and gloss clear in which I gave a good 24
hour standing, I sprayed on the Navy colour, After an hour or so I went to it
with the masking tape ripping of some of the paint to give it that chipped
affect. Once that was done I then went over the entire model with a black pastel
to give it the overall grubby look and to highlight the panel lines. Then came
the decals.
Alan
|
Click on
images below to see larger images
|
|

|

|
|
|