|
Background
Messerschmitt’s
Bf109 E-4/7 aircraft, until the appearance of the F model near the end of the
Battle of Britain, were the Luftwaffe’s main fighters. They were used in all
theatres of operation during WW2. While the design and configuration of the E-4
was basically the same as the E-3, it had the improved square canopy. The E-7
version had a centreline rack mounted to the fuselage for a 300 litre fuel take
bomb, plus most of the E-7’s also used a pointed, bullet shaped spinner.
The Kit
This kit was a
gift to me from an American friend, who regularly sends me a box of goodies
throughout the year. The kit is of the “high tech” variety, containing an
etched brass fret and featuring dropped flaps and optional position leading edge
slots. I was absolutely delighted to receive this particular subject as I enjoy
building Hasegawa kits. They fall together with little effort and are excellent
for hassle free building. The decal sheet was large and comprehensive, allowing
a modeler to build either of 4 different schemes.
|
Click on
images below to see larger images
|
|
|
|
Construction
Construction
starts as usual with the cockpit. The cockpit sidewalls, seat and floor were
painted RLM66. The instrument panel is a fine piece of moulding, with loads of
detail just waiting to be enhanced by careful painting. A base coat of RLM66 was
applied, once this was dry the instrument dials were picked out in black and dry
brushed in white to bring out dial details. Future was then carefully placed
into each dial to simulate glass. The pilot seat was tackled next with belts
picked out in light grey and buckles in silver. I then washed the whole cockpit
area in raw umber oils and dry brushed to enhance detail. Careful painting
enhanced remaining cockpit features, with constant cross checking to my
references. The cockpit was then assembled and left aside to dry.
The etched brass fret
consists of replacement parts for the small radiator grills and control baffles
under the wings. There is also a part for the intake baffle within the air
intake below the engine. These parts were carefully snipped from the fret,
cleaned up and super glued into place before the various shrouds were attached
to the underside of the wing. The baffle under the engine was left to after the
two fuselage halves were joined so as to ensure a horizontal position.
Now comes the good part,
fuselage halves were duly joined, with the assembled cockpit sandwiched between.
(At this point something usually has gone wrong. My fingers were crossed!). The
completed assembly was then set aside to dry.
Wings were next on the
list and were assembled with no fuss at all. The leading edge slots and flaps
were tacked into their respective “retracted” positions in readiness for
painting. The wings fitted to the fuselage perfectly. On all sub assemblies,
engraved panel lines were re-engraved where necessary. Tail planes were added
and the cockpit transparencies masked and attached in readiness for painting.
Painting and Decaling
A tough choice
had to be made when selecting a paint scheme. The kit allows 4 versions of the
“Emil” to be built. The choices were as follows;
- 1/JG2 Maj. Helmut Wick October
1940, Belgium “Horrido!”
- 7/JG26 Obltn Joachim
Muncheberg Spring 1941, Sicily
- 4?JG77 1940
- Japanese Army 1942 Kagamihara
Airbase
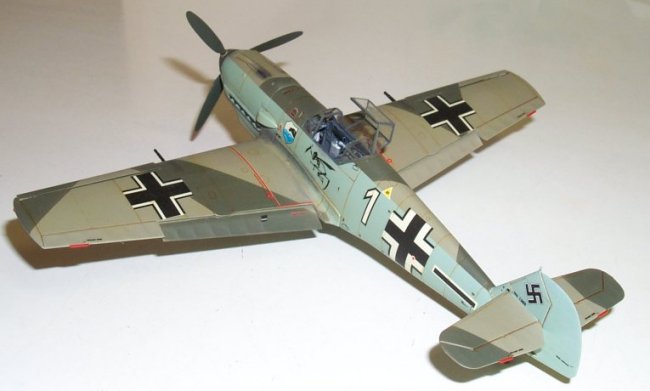
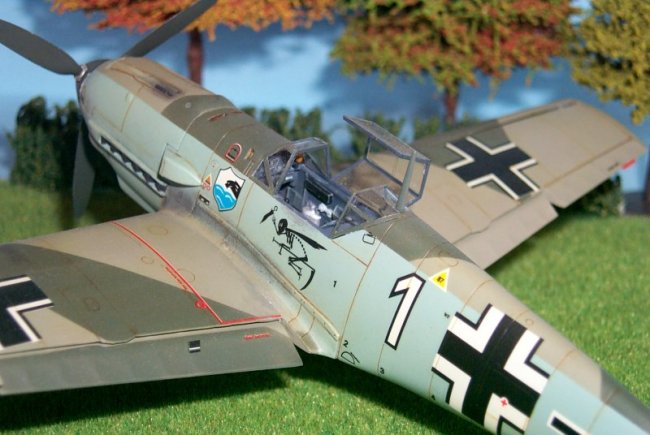
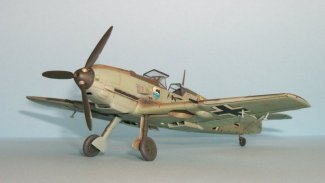
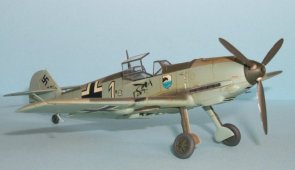
After much soul searching and
gnashing of teeth I decided to build the Jg77 offering. This particular
“Emil” carried a simple RLM02/71 splinter camouflage pattern over the wings
and fuselage spine, with the underside RLM 65 carried high up the fuselage
sides. There was no mottle at all, which I thought was part of the schemes
appeal. In addition to the JagdStaffel shield on either side of the nose, the
subject carried a caped skeleton riding a scythe.
Choice of
scheme made, I used paints from my excellent but dwindling Aeromaster
“Warbird” acrylics supply. These sprayed perfectly as usual. Once the paints
had dried I used “Super Stride” to give a gloss surface ready for the
decals.
The decals
looked a little thick on their backing sheet, but were excellent quality, dense
and sharp. This proved to be the case when the decals were used on the model.
They bedded down well and responded excellently to Aeromaster setting solution,
with only the smallest amount of silvering occurring. The “Emil” was then
set aside for 24 hours to allow the decals to dry.
Weathering
My favourite
part of building a model kit would have to be weathering! After the decals had
dried I sealed the whole plane with another coat of future (wash the decal
solution and decal glue away first) and used a raw umber/burnt sienna oil wash
to enhance the recessed panel lines. This looks absolutely atrocious until the
excess is wiped away with a cotton bud (q-tip) moistened in white spirits. The
Future protects the paintwork and decals from any damage by the washing
procedure. Once again the model was put aside to cure and finally sprayed with
Aeromaster flat, to give a matt appearance.
Final Touches
Undercarriage
was the last item to be added and apart from careful applications of powdered
pastel around the engine exhaust and gun barrels, my “Emil” was finished!!
All masking was then removed and the canopy cemented into place using Testors
clear parts cement. Finally the flaps and leading edge slots were repositioned
“down”.
In
Conclusion
All together,
another fine Hasegawa product. No filler was used throughout the whole model kit
with all the parts fitting positively. It was this, more than anything that made
this kit a most enjoyable trouble free, build providing me with a break from my
usual Monogram kits.
It is
difficult to compare this kit with the equally excellent Tamiya offering, as I
do not have the Tamiya one in my stash. But the comments were excellent around
the club table, particularly from the club “109” expert. It looks like a
Bf109 and that is good enough for me!
Highly
recommended
References
Me109 in action
pt 1
Squadron/Signal books
Madmike
|
Click on
images below to see larger images
|
|
|

|
|