|
The Mikoyan Mig-21 (Nato
codename Fishbed) was developed in the late 1950's and became the backbone of
not just the Soviet Air Force, but also all Warsaw Pact air forces, as well as
air forces of many third world countries. One country that purchased the
Mig-21 was India. As I understand it, India has a large fleet of aircraft
from both east and west (the Jaguar, Mig-21 and 23, Mirage 2000, Su-27, C-130,
Sea Harrier, etc.) and has even operated indigenous types like the Marut and is
now developing the LCA fighter. The Fishbed (first FL, then MF, then bis)
became a mainstay of the Indian Air Force and is operated today in an advanced
training role. It has also been flown as an aggressor aircraft for air
combat training and has been painted in a large number of camouflage schemes.
The aggressor schemes in particular are striking.
|
Click on
images below to see larger images
|
|
|
 |
|
THE MODEL
Enter the Aggressor
Group Build by Ed Grantham and Joe Dempsey in late September. I had just
received a 1/72nd scale Albatros "weird Mig's" sheet from Victory
Productions, and had at first intended to build the Polish swordfish bird.
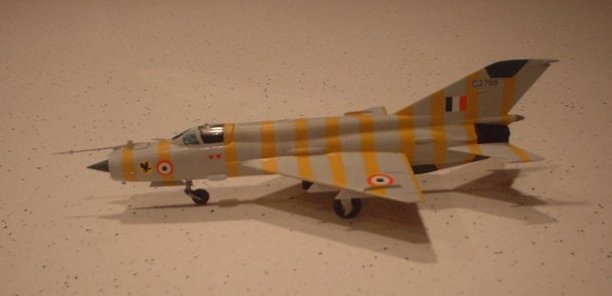
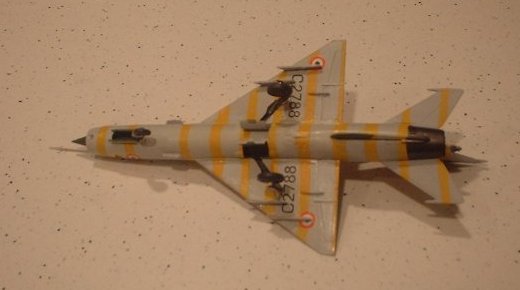
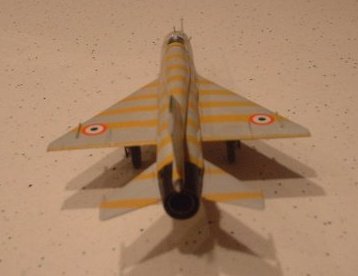
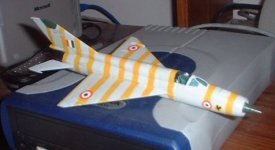
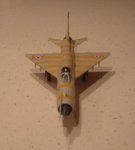
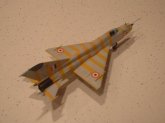
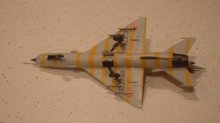
But the Indian AF aggressors caught my eye, and the one with the yellow stripes
was irrestistible. So I searched about for a suitable Mig-21 kit. I
was at first unsure what version to get, since the Albatros instructions listed
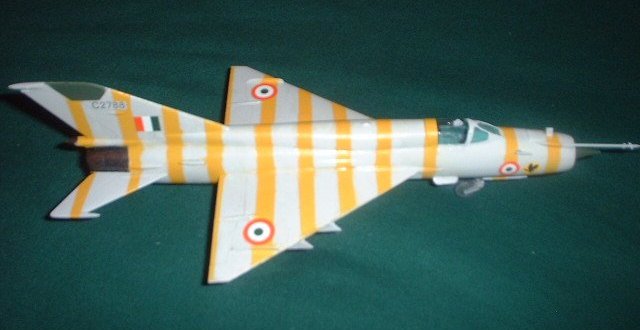
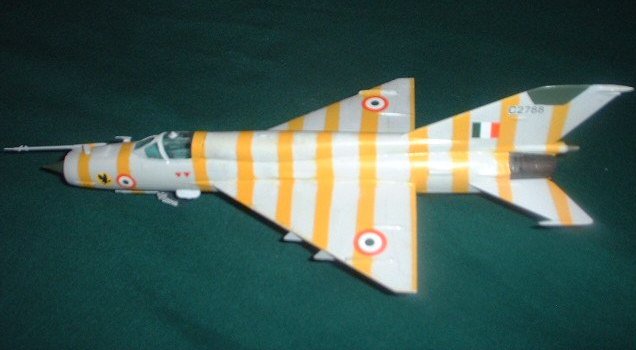
the bird as a "MF bis". The bird is from 24 Squadron
"Hunting Hawks", and it is a Mig-21bis, serial number C2788. I
went to one of the hobby shops here in Salt Lake and found the Fujimi Mig-21
kits. They had a MF for 25 bucks and a SMT for 13, and they appeared to be
the same, so I got the cheaper kit. But when I asked around ARC, I learned
about the differences between the various versions of the Fishbed (the spine is
the big tipoff - the bigger the spine, the later the version, with the C the
earliest, then the FL, then the MF, then bis, then SMT being the latest).
Thank you to all the Arc'ers who helped me on this). I had already started
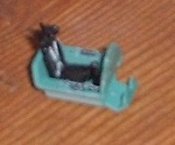
on the cockpit and finished the tub and the seat, so I tried sanding down and
cutting up the spine and tail to an acceptable look for the bis, with my Dremel
tool and sandpaper. But the job was very rough so to speak, so I decided
to break down and get the MF, which turned out to have a Bis spine, which was
just right for my bird.
|
|
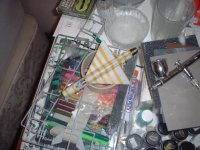
The Fujimi kit's spine is
separate from the fuselage, so I broke out my brand new Iwata Eclipse HP-CS with
the nifty gravity feed feature and used MM enamels to paint the inner cockpit
area (Russian interior green) and the nose cone, dielectric areas, and landing
gear bays (Russian Topside Green). The back end got Alclad steel, and I
assembled the fuselage halves from the SMT kit, figuring I'd attach the Bis
spine from the MF kit. But I made a boo-boo. A BAD boo-boo...I
forgot to glue the nose landing gear bay into the fuselage before I glued the
halves together! I tried to contort the bay into the bird but couldn't do
so without splitting the halves and messing up my sanded and welded fuselage.
So I broke out the fuselage from the MF kit and started the process over.
I was able to use the first cockpit I'd already made, and soon I was back in
business. I ended up using Alclad Jet Exhaust on part of the metal area
and Alclad Steel on the rest along with the aforementioned MM Russian interior
green and topside green in the cockpit, gear bays, etc. After the fuselage
was assembled, the spine and tail were assembled and placed on the plane at the
same time, then the delta wings followed. The Ambroid pro-weld glue worked
great and I only had to use a small amount of Tamiya putty applied with a
toothpick to fill the wing root seams. I decided to leave off the
elevators until the final finish was applied to the rest of the plane, due to
the complex masking job that lay ahead.
THE PAINT JOB
I started out by dipping the
canopy in Future, then gluing it to the bird with clear parts cement, along with
gluing the HUD to the coaming. I masked the canopy using Tamiya tape
(after earlier unsuccessful attempts with Parafilm) and sprayed the outer frames
and cockpit area with Russian interior green (thanks Cheetah for that
suggestion!). This is much easier than trying to paint the inside of the
frames for the realistic look from inside the cockpit. I then airbrushed
MM Enamel Light Gray over the frames/cockpit area and the rest of the bird
(after masking the nose cone, dielectric areas, gear wells, and afterburner). After
letting the finish cure for 24 hours, I masked off the yellow stripes.
Then I sprayed another coat of Light Gray over the stripe areas to seal the tape
in. After another drying period, I sprayed MM Enamel Insignia Yellow and
let dry, then unmasked the areas. The method worked like a charm for the
nose stripes but I got bleed through on the wing/mid fuselage areas, due to
problems with the tape covering the fuselage join/wing root area. Next
time I'll use smaller sections of tape instead of long strips when I do a job
like this. I brushed on Light Gray to touch up the affected areas, and as
a bonus got a slight tonal variation, which actually made the bird look more
realistic - Indian AF Migs tend not to be immaculate, in fact many are highly
weathered.
|
Click on
images below to see larger images
|
|
|

|
|
At this point, the weather turned
cold, snowy, and nasty. I couldn't go outdoors to airbrush anymore, so I
brushed several coats of Future for the decals while sitting comfortably at my
laptop indoors. The decals went on great, the only problem being that
the squadron insignia on the left side was placed slightly above where it should
be and would not budge when I tried to nudge it downward. Then I brushed
on a couple of coats of Testors MM Acryl flat coat to dull down the finish, but
I didn't try to make the finish totally flat, as the Albatros instructions as
well as my own research indicated the bird had a semi-gloss look. Finally,
I added the landing gear and the other little bits and pieces, the elevators,
and an antenna that I scratchbuilt from the plastic of one of the Atoll missiles
included in the kit. Not all the pieces are on the bird; it's missing a
couple of tiny bumps near the back because I lost them in the carpet. Ah
well. After the elevators got their yellow stripes, I was done and quite
satisfied.
CONCLUSION
The Fujimi kit is very good.
The fit didn't give me many problems, and the bird came together well. The
cockpit is reasonably detailed, and a good drybrush on the consoles will bring
out a decent amount of detail. The seat was okay, not great but
enough for me, because it at least had harnesses molded in. (This bird has
no aftermarket whatsoever in it other than the decals, it is totally out of the
box). The instrument panel is molded in clear, so I was able to mask off a
couple of dials and make the panel more realistic. Again, drybrushing
brings out good raised detail. The kit does need nose weight, but some
blue tack in the cone took care of that. The Albatros decals are superb
and I look forward to doing more birds with their unique schemes.
This bird came on the heels of my
F-5 Aggressor, and was finished exactly a year after I made my Airfix
Mig-21 Fishbed-C, which is in the Gallery, and is sitting on a shelf in our
family cabin in Pinetop, Arizona. Sometime, I'll get the 2 Mig's together
and take a picture. I really enjoyed this project and learned a lot about
the Indian Air Force at the same time.
Happy Modeling!
Justin
REFERENCES:
- Murph's article on his
Fujimi Mig here in the ARC Gallery. -
very helpful
- http://www.bharat-rakshak.com
- lots of Indian AF pics, including one of C2788
- The Mig-21 walkarounds on ARC
- helpful when trying to sort out gear well colors.
|
Click on
images below to see larger images
|
|

|

|
|
|
|