|
The History of
'Old Crow'
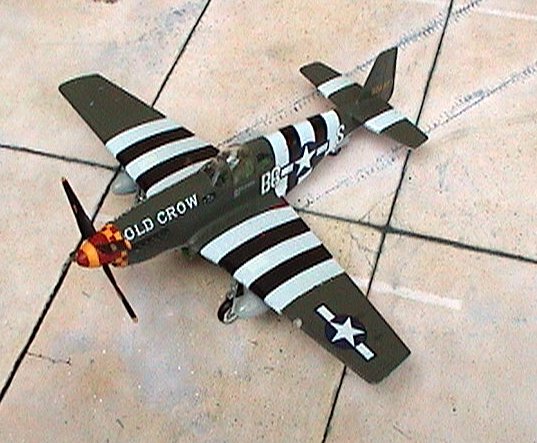
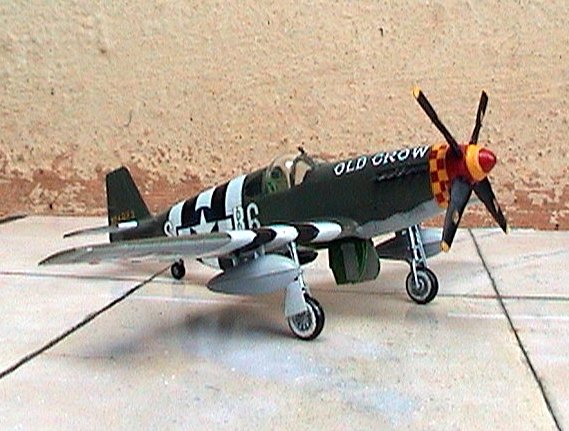
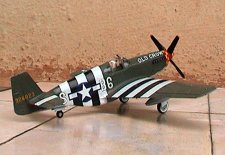
'Old Crow' was the
name of a P-51B Mustang flown by Capt. Anderson. He flew for the 357th Fighter
Group, 8th AF, nicknamed 'Yoxford Boys', flying out of Leiston Field, UK during
WW II. Bud was the leading ace of the 363rd FS, with 16 and a half kills, and is
a WWII Triple Ace. Currently aged 82, Bud still flies a restored P-51
along with General Charles Yeager. Bud also flew a P-51D later in the war,
carrying the 'Old Crow' markings to that plane as well. 'Old Crow' still
continues to fly to this day after restoration, and is owned by Mr. Jack Roush.
Info Courtesy
: Bud Anderson's website, http://www.cebudanderson.com
Kit Information
I made this kit as
part of the D-Day Group Build at ARC, as well as the Op Overlord 2004 Campaign
going on at Armorama too. It is my salute
to those brave men who gave their lives on the beach heads of France on D-Day.
I have always loved
modeling Academy kits in 1/72 scale, and this kit is no different. In fact, I
think this has been my best kit in 1/72 scale so far, after a succession of
Academy Hurricanes. The kit contents are crisp, with zero flash, and there
aren't that many fiddly bobs and bits to ruin your experience. The decal sheet
is absolutely fantastic, with Academy being kind enough to provide markings for
three planes, and is a great incentive to make more Mustangs! There is still a
problem with the USAF Star decals being translucent, but this can be easily
remedied with some white decals on those areas. The checkered nose area decals
are an absolute treat, and go on without any fuss (meaning 'a minimum amount of
swearing!')
Another gripe I have
on this kit is the lack of a continuous fuselage. For some odd reason, the
fuselage has been split up, with two frontal 3/4 pieces and a 1/4 piece tail
section. This gives rise to a small ridge at the join of the main fuselage to
the tail, ensuring the usage of sandpapering to eliminate it.
Otherwise, a superb
kit, and great value for money. I'm still hanging on to those spare decals and a
spare canopy as a bonus!
Paints used were my
usual mix-n-match brand of locally available Fevicryl acrylic paints, thinned
with water and shot through an airbrush. I'm especially pleased that the Olive
Drab color turned out exactly right after just two attempts at mixing the
paints!
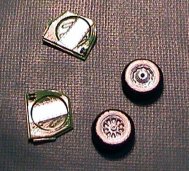
Starting off :
Cockpit Area, Tires, Wheel Bays/Covers and Propeller
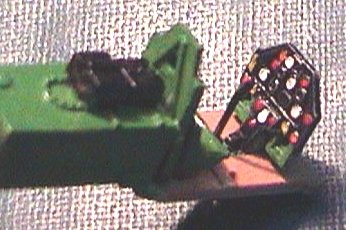
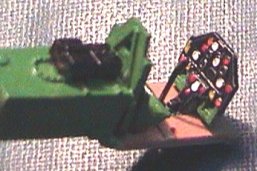
As with all my
models, I started off on the cockpit area. The instrument panel went first, with
a coat of flat black, then some dry brushing with silver, and finally painting
in the dials with a toothpick. I admit I took a lot of license in using red,
green, white and black, but since I did not have any references, I had to use a
lot of imagination in this case. Anyway, the dials turned out just great, and
made the panel come alive.
This was then
followed by the seat assembly, and painting of the seat area, the radio boxes
(behind the seat), and the side panels. I did want to do some scratch-building
in the side panels, but it looked too small and unwieldy to me (with my big
fingers), so I gave up. Anyway, Academy has done a decent job here, so nothing
was lost. At the same time, I also painted the wheel bays and interiors of the
wheel covers in the same color as the cockpit in Interior Green. The floor of
the cockpit was painted using Light Tan. Washes were then applied using heavily
diluted acrylic black paint mixed with water and some mild soap solution.
Seatbelts were made
out of strips of scotch tape. The seat belt clips were made by winding small
diameter electrical wire around another, cutting the ring at the neck, and then
passing the tape strip through the ring. The rings were then dry brushed with
silver.
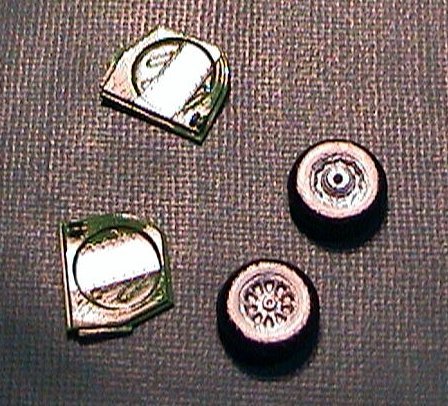
Next, it was the
turn of the tires for treatment. The Academy box art shows the tires as being
completely black from hubcap to tread, but this is not correct according to the
modeling guide provided at Bud Anderson's site(P-51B
Modeling Guide). The picture of the plane clearly shows a white ring around
the hubcap, starting at the cap, and ending at the tread. This presented a small
problem, which I got around after some thinking.
I first sprayed the
entire wheel black. Then, using masking tape, I masked off the wheel until the
hubcap, removed the interior portion, and painted it silver as required. Then,
after allowing the silver to dry completely, I again masked the whole wheel,
masked off the silver area, and then cut out and removed the outer areas,
leaving me with a black wheel with a masked silver center. On top of this, again
I put on a layer of masking tape, and using a circle template, drew a circle on
the masking tape, corresponding to the diameter of the white area. Finally,
using a sharp #11 blade, I cut along the pencil line very slowly and carefully,
and removed the interior part, being careful not to remove the tape layer
beneath (the one covering the silver area) along with the one on top. This way,
I got a donut-shaped section on the wheel. This was then sprayed with white
paint to get the background.
|
Click on
images below to see larger images
|
|
|
 |

|
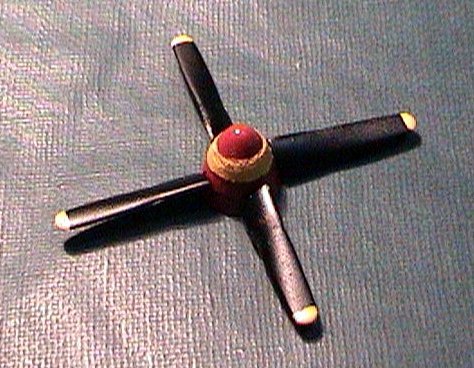
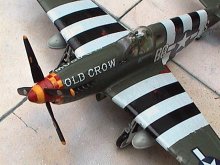
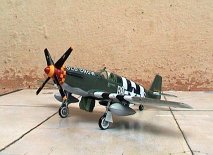
Finally, I moved on
to the propeller. This posed another challenge: a yellow ring from the middle of
spinner to the edges of the blades over red. This was solved by first spraying
the entire spinner cap in red. This was then masked off with scotch tape in a
conical wraparound, and cutting out the required area of tape. This intermediate
section of tape was removed, and sprayed with yellow to get the ring.
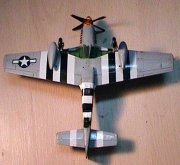
Fuselage Assembly, Painting
and Decaling
From this point on, everything
went like clockwork. The front fuselage parts were joined, and followed by the
tail section. Tail planes were glued in, and the wing sections were assembled
and mated to the fuselage. There is a bit of weird adjustment required, since
the intake filter juts out over the wing assembly, and the wing assembly has to
be slid down and backwards at an angle to slot into place. Another manufacturing
boo-boo I guess!
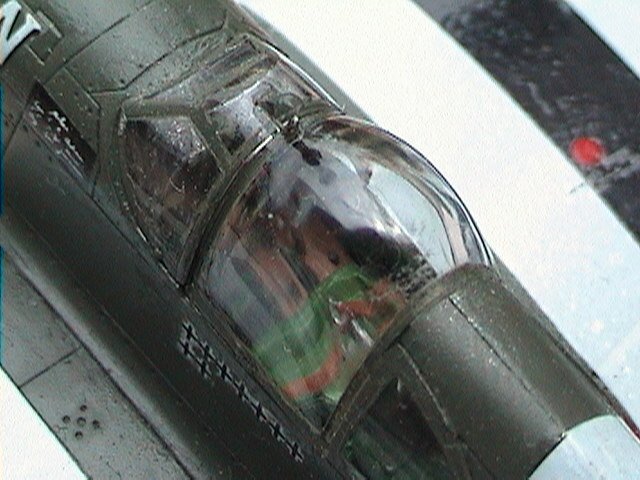
The canopy sections were
carefully masked using Magic Scotch tape, and attached before painting with
Blu-Tak to the main model.
Paints were then sprayed on by
airbrushing. As explained earlier, I mixed up my own batch of acrylic Fevicryl
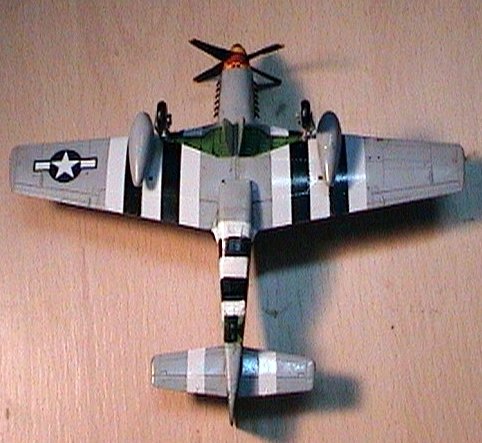
paints, thinned with water, and sprayed away. The undersides got a coat of
Neutral Gray, and the top got a spraying of Olive Drab after necessary masking
of the undersides.
After allowing to dry for two
days, the decals were then applied. I used a coat of Future below the decals
before applying them. This ensured that the surface was glossy, and also gave a
good sticky surface for the decal to hold on to. I did encounter some problems
with the invasion stripe decals, especially on the underside over the air intake
filter. I had to cut up some decals to get the final effect properly.
|
Click on
images below to see larger images
|
|
|

|
|
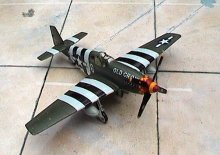
Finishing up, and adding the
final touches
The propeller was attached at the
end, along with the canopy sections. The Malcolm canopy hood was attached to the
front canopy using clear cement solution, and painted using a toothpick. Minor
touch ups were required on the fuselage because of paint scratched while
handling. Future was applied to exposed sections as a prelude for washes, and
allowed to dry overnight. Subsequently, a sludge technique was used for the
washes employing a solution of dishwashing liquid soap(10%), water(70%) and 20%
black acrylic paint. Excess wash was wiped off with a slightly wet rag after
allowing the wash to dry for 1 hour. I applied three coats of wash to get the
final effect. I decided against weathering my model any more, since I like them
more clean  . .
The engine exhaust parts were
then painted flat black, attached to the plane, and dry brushed with silver. The
wheel covers and wheel assemblies were attached, and voila!! My 'Old Crow' is
ready to fly!!
|
Click on
images below to see larger images
|
|
|
|
|
Hope you enjoyed my
account!! Happy Modeling from India!
Shekar
|
|