|
I
wondered how this all got started, I was very fortunate to be back on American
territory. We had bailed out of “Whirling Dervish”, 02303, when our fuel ran
out and all made it down safely but Harry, Lt. Watson that is, he got his arm
caught on the parachute riser and dislocated it on landing. He was in a lot of
pain for a week until a doctor put it back in place.
The
Navy and Army put this plan together in early January to bomb material targets
in Japan while hoping to make a psychological effect that would call unit’s
home from far theaters to aid in home defense, also imparting a fear factor in
Japan while getting a favorable reaction from the American People.
Col.
Doolittle studied various planes for the mission; the requirement was for a
cruising range of 2400 miles with a bomb load of 2,000 lbs. The B-26 could have
done the job with range and load capacity, but carrier takeoff characteristics
were questionable. The B-23 also was suitable, however with the larger wingspan
fewer could be brought on board and the right wing clearance with the carrier
island was to close.
The
B-25 ended up being the aircraft of choice, the plan was to take off and land
from an aircraft carrier, but tests by three B25’s at Norfolk showed that
takeoff would be easy; landing would be next to impossible. It was decided to
take off east of Japan and navigate in a westerly direction, landing at
airfields in China or possibly Vladivostok. Negotiations with the Russians
eventually failed and that idea was abandoned.
The
24 aircraft were prepared by adding a 265 gallon steel gas tanks manufactured by
the McQuay Co., and installed by Mid-Continent Airlines in Minneapolis. These
were then removed and replaced by a 225 gallon leak proof tank manufactured by
United States Rubber Company out of Indiana. The tanks had issues with leaky
connections, adjustments to the tank size were made reducing capacity and it was
found that pressurizing the tank increased capacity by 10 to 15 gallons. Housing
this tank in the bomb bay allowed us to carry four 500 lb demolition bombs or
four 500 lb. incendiary clusters. McQuay Co. also provided us with extension
shackles to carry the bomb load. A rubber bag tank holding another 165 gallons
was installed in the crawl way above the bomb bay. After the gasoline was used
up we could turn the tank vent aft sucking the air and vapor out, the crew could
stow it to one side. A third 60 gallon tank was stored in the lower turret area,
which had been previously removed. Ten more 5 gallon gas cans were stored where
the radio operator usually sat; these were used to pour into this rear tank as
the level went down. As they were emptied the crew punctured holes in the cans
and threw them overboard. This gave us 1141 gallons of fuel, but care was needed
in filling the tanks to assure the air was out, this was done by filling and
then shaking down the aircraft and topping it off again.
All
excess equipment was removed, while de-icers and anti-icers were installed as we
were still negotiating with the Russian for landing permission. This did
slightly reduce the cruising speed. Wooden guns were stuck out of the
extreme tip of the tail, we were not at all attacked from the rear on our
mission, so it probably worked. It was found when the turret guns were fired
close to the fuselage that rivets popped and tore the skin loose, steel blast
plates were then installed.
The
Norden bombsight was removed and a simplified bombsight developed by Capt.
Greening was then installed. Tests showed a much greater bombing accuracy at
1500 feet or less when using these sights compared to the Norden one.
The
.50 calibers were acting up, they would not fire properly, only with short
bursts or not at all. W.C. Olson from Wright field overcame the issues with the
smoothing down of parts, replacing faulty ones and training the gun maintenance
crews.
The
230 lb liaison radio set was removed, since radio silence was to be maintained.
Each ship in the formation also carried cameras located in the extreme tail tip
between the wooden guns. Only two landing flares were carried, if the need
arose, to be thrown out by the rear gunner.
Well
how did I get here, I was a member of the 17th Bombardment group and
Lt. Colonel Mills explained to our commander that this was an extremely
hazardous mission and he needed twenty four experienced crews, as time to train
would not be available. I volunteered along with all the rest and it was
more than we could use, so our twenty four crews were off to Elgin Field in
Florida, for final training. On March 25th, twenty two planes headed
for Sacramento, two others had been damaged and were not flyable.
Click on
images below to see larger images
By
April 1, sixteen planes were loaded on the USS Hornet, commanded by Admiral
Halsey. While enroute, we had training lectures on gunnery, navigation and
meteorology. Gunnery practice was carried out by using kites flown from the
Hornet.
Our
plan, was to takeoff just before dark and bomb at night and arrive in the early
morning hours in China. We were briefed to avoid non-military targets,
particularly the Temple of Heaven and not to go to Siberia.
We
were #9 in line for takeoff, as our engines revved up. It was 10 hours earlier
than planned, the first enemy patrol vessel detected us at 3:10 AM on
April 18th, it was now a few hours after dawn and 824 miles east of
Tokyo. Lt. Watson got us off safely as we circled to the right; he then flew us
over the axis of the Hornet so we were lined up with the drift sight.
As
we entered Tokyo airspace the antiaircraft fire was inaccurate, they were black
and likely from 37 or 40 mm guns. We did not see any machine gun crews active
and there were a few barrage balloons at about 3000 ft. which did not impede our
bombing. I navigated us to our target, the Kawasji truck and tank plant where we
placed 3 demolition bombs and one incendiary cluster. We also hit a factory
building near the railroad station south of the Imperial Palace.
We
were about 100 miles south of Poyang Lake, our bird was running on fumes, Lt.
Watson put on the auto pilot and ordered us to bail out. We did one by one,
Engineer-Gunner T/Sgt Eldred V. Scott, Bombardier Sgt. Wayne M. Bissell, me
Navigator-Gunner Lt. Thomas C. Griffin, Co-Pilot Lt. James M. Parker
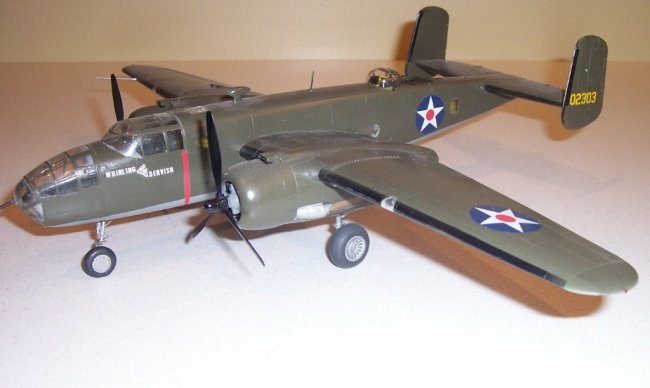
Jr., and Pilot Lt. Harold F. Watson. We never saw Whirling Dervish again.
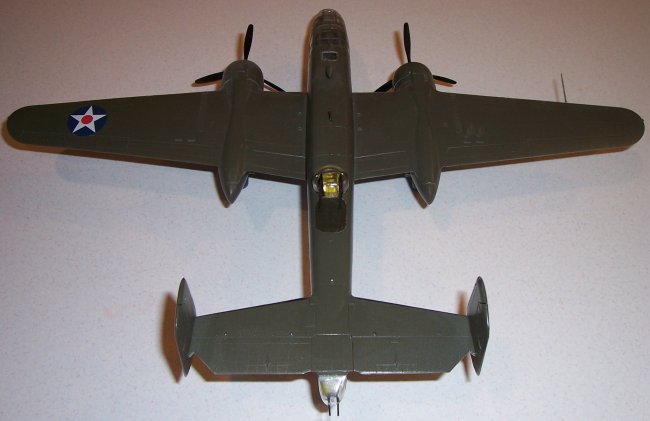
Model
This
is the Accurate miniatures 1/48 B-25B, their first of a series of excellent B-25
models. I built this around 1999 – 2000, the upper turret blast plate is a cut
down mailing label, painted and stuck on, no other extras. I will not debate any
of the build issues of this aircraft which have already are published out there.
To me this is a fine kit, I have built the “B”, “C” and will be building
the “G” version this next year. A.M. supplied decals for each of the sixteen
aircraft and enclosed was a copy of Col. Doolittle’s report on the mission, a
great piece of history to have. I chose to do aircraft #9, because of
another aspect of my hobby.
Hobby
I
enjoy going to air shows and listening to the forums held with aircraft crews
and maintenance personal. I had the honor to meet Thomas Griffin Navigator plane
#9, R.E. Cole co-pilot of Doolittle’s plane #1, co-pilot Jack A. Sims
plane # 14 and Bill Bower Pilot of plane #12 at the Wings of the North air shows
at the Flying Cloud airport in Eden Prairie Mn.
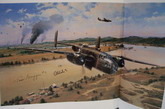
There
signatures adorn pages in two of my books, Bomber Missions Aviation Art of World
War II, by G.E. Patrick Murray, on the artwork of Robert Taylor. The
second book, Time Life’s “The Rising Sun” on the page showing a picture of
Doolittle’s plane taking off.
Time
fades for the entire gallant hero’s of WWII, let not the memories fade.
Information
from:
-
1)
Col Doolittle’s report.
-
2)
Time Life “The Rising Sun” by Arthur Zich.
-
3)
Bomber Missions Aviation Art of World War II, by G.E. Patrick Murray.
Thanks,
Mark L. Rossmann
Twin
Cities Historians Club
Click on
images below to see larger images
|