|
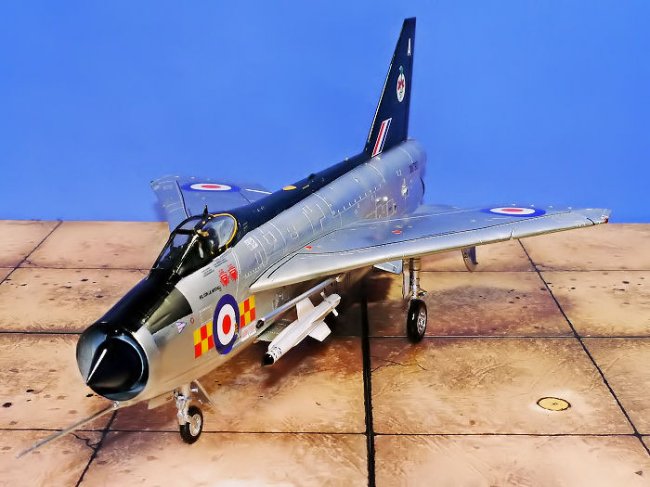
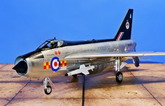
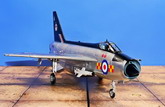
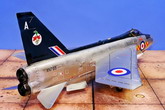
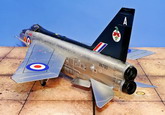
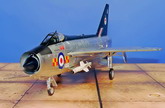
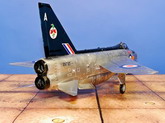
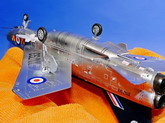
For your viewing pleasure, here are some photos of my Airfix F.2 English Electric Lightning. The English Electric Lightning was the first operational British aircraft capable of achieving twice the speed of sound. The Lightning was the first (and only) Mach 2-capable platform ever developed for the RAF, and the fastest British fighter of all time. It was also the first aircraft to utilize "supercruise" (reaching supersonic flight without the use of afterburner), and the first RAF platform to feature an integrated weapons system for automated missile delivery.
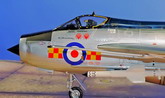
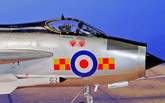
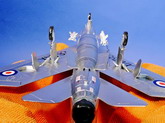
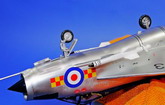
The Lightning had an unusual design with two turbojets mounted one above the other in the fuselage and the cockpit placed on top of the nose intake. The two engines mounted one above the other was a unique way of minimizing the drag of the twin engine installation.
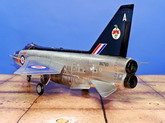
Designed primarily as a Mach 2 interceptor to meet incoming Soviet bombers at heights up to 60,000ft, it was later developed for ground attack. The RAF used this variation in Germany and ground-attack versions were sold to Kuwait and Saudi Arabia. It was armed with two 30 mm ADEN cannons and two air-to-air missiles, at first the Fairey Firestreak and later the Hawker Siddeley Red Top. It was a good dogfighter, with a speed, acceleration and climb rate that were difficult to match.
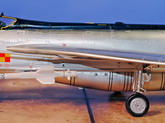
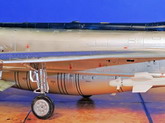
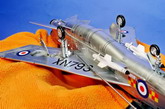
Limitations of fuel capacity dominated the Lightning’s design as its fuselage was nearly all engines and ducting, and thus could not hold much fuel. All available room was adapted for the purpose of holding fuel. The flaps were even used as fuel tanks, and the landing gear had very narrow tires that retracted outward so that there could be greater tankage inboard. This also meant that when the addition of drop tanks for greater range was considered, they could not be placed beneath the wing and were mounted on top instead.
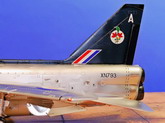
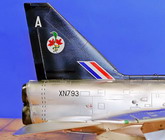
The model here depicts an RAF F.2A Lightning of the 92 Squadron stationed in Germany in August of 1972. The aircraft, #XN793, was flown by Wing Commander J. B. Mitchell, commanding officer of the 92 Squadron.
|
Click on
images below to see larger images
|
|
|
Construction
This was an out of the box build except for the seat belts I added to the ejection seat. The kit went together fairly well following the 26 step building instructions. The assembly illustrations are pretty clear and the parts fit is pretty decent. However this is not a shake and bake build as the kit has some fit problems.
The first problem I encountered was with the nose gear wheel well. Once assembled, there is a gap of about a ¼ inch between the well tub and the fuselage. This required some difficult filling and sanding. Note that step 6 illustrates where to place nose weights. I installed three good sized lead fishing weights that prevented tail sitting. If you don’t add weights, you will have a big time tail sitter.
Mating the nose intake ring to the fuselage was also a problem—it was not a good fit and required filling and sanding. Mating the wings to the fuselage brought their fair share of filling and sanding. Attaching the burner cans to the fuselage was also a problem—it was not a good fit and required some serious filling and sanding.
One last fit problem was with attaching the landing gear struts (parts 78, 79, 84, and 85) to the main landing gears—they just would not fit according to the illustrations in steps 21 and 22. I searched the web and found an article that dealt with the problem. The article explains that you need to trim the parts to make them fit. The rest of the kit went together without any major problems, just a bit of filling and sanding here and there.

Painting
To begin the painting process, I airbrushed the ridge on top side of the fuselage and the vertical tail with Floquil Dark Blue. After masking the Dark Blue, I airbrushed a primer coat of Model Masters Gloss Black over the rest of the model. I let the primer coat dry for two days, then airbrushed the nose intake ring with Alclad White Aluminum and the gun port panels with MM Burnt Metal. The rest of the model was airbrushed with Alclad polished Aluminum. I did not prepare the model surface very well before painting, as a consequence the bare metal finish did not come out as well as I would have liked.
Decals
This Airfix Lightning kit provides and exhaustive decal sheet, but the decals are of excellent quality. They are well printed and easily placed on the model. There was a slight silvering tendency, but a touch of Solvaset eliminates any silvering. Note that this model has a lot of striping. I cut these decals into smaller more manageable pieces.
Once the decaling was complete, I wiped down the model with a damp cloth and applied a light coat of Future to the model. To finish off the model, I airbrushed it with a coat of MM Gloss Lacquer Finnish.
Comments
This was the first new release Airfix kit I have built. I have been impressed, the detail is good, the decals were excellent, and the instructions were pretty clear. Most importantly, the parts fit was good—much improved over Airfix kits of the past. This was an enjoyable build and would recommend the kit to any modeler.
Burt Gustafson
|
Click on
images below to see larger images
|
|
|
|
|
|