|
1. Components
Anigrand 1:72 kit
2. Fuselage: Initial preparation
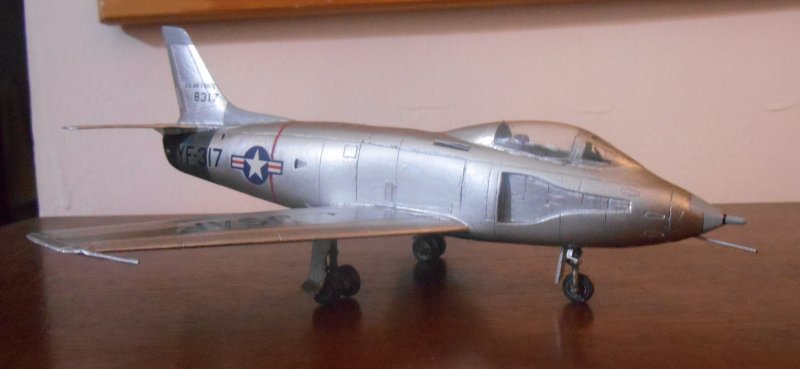
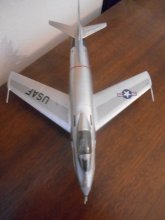
The kit is broken down in an entirely conventional manner. The NACA intakes open into the fuselage interior, but very well-fitting splitter plates are provided, which blank it off just fine. The surface detail is pretty comprehensive, but I added some panel lines to the inner face of the intake and an extra panel on the aft fuselage, in line with such information as I could glean from photographs (unfortunately, and unusually, neither prototype survives, despite their long career with NASA). The castings needed only perfunctory rubbing down on their mating edges, although I needed to do a fair bit of thinning (and did not, in the end, do quite enough) to fit the jetpipe into the aft fuselage. I left the plated-over ports for the heavy armament of six 20mm cannon (which were never fitted to either machine) as it was difficult to determine whether the ports were plated over or whether the entire area had a new skin fitted.
There are pins on the forward face of the wing root joints, to fit into well matching holes on the fuselage, but I elected to replace these with brass rod for strength - a hole at that station was drilled through the wing root, with another one on the opposite fuselage half to match, and a single length of brass rod pushed through. A matching arrangement was made aft of the main landing gear bay. For the tailplanes, a single hole through the fuselage halves was drilled, with a length of metal rod pushed through to support the tailplanes, which had holes drilled in the roots to accept it. Another short length of brass rod was glued into a hole drilled into the base of the fin. Plenty of test matching of flying surfaces and fuselage was carried out to finalise the arrangement before the fuselage was assembled.
3. Interior
A complete cockpit bathtub is included, with ejection seat. There is a pair of horizontal lugs on the side of the aft shelf - it's not clear whether these are spacers or just pour stubs. I suspect the former as they are on both sides. At any rate, after repeated testing for fit, the bathtub was blanked off at the forward end, an etched metal throttle added from the spares box, and a large trim wheel opposite added from scrap plastic. The instrument panel is quite a different shape to that provided, and the sides had thus to be extended.
Once the bathtub had been completed it was painted in Humbrol Interior Green with the instrument panel in black and the control column picked out in black and silver. A wash was added, followed by drybrushed highlights of Interior Green mixed with 24 Trainer Yellow. The inner walls of the cockpit were painted in the same way.
One of four points to note regarding the similarity of this aircraft to the rest of the F-86 family is the ejection seat. This is NOT the same as that fitted to other early Sabres. It is in fact one unique to this aircraft. The kit one is reasonable, but some building up of the seat pan sides was necessary, as was the addition of large firing handles on the arms, from fine fuse wire.
The seat was largely painted in Humbrol 127 Ghost Grey, with the firing handles picked out in Trainer Yellow, and the headrest face in Humbrol 19 Postbox Red. The rails were painted with Humbrol 201 Metallic Black, and the straps in Humbrol 30 Dark Green, the buckles being picked out with silver.
Prior to installing the bathtub and filling in the considerable gap on the aft shelf, I sanded the coaming flat as it seemed too high. Once the Milliput had cured, I cleaned it up as best I could and painted in the same way as the bathtub. I would have preferred a larger shelf that I could sand to fit.
The acetate canopy, which I suspect may be too tall (note that the F-93 did not have a standard F-86 canopy, but a new and larger one), had the interior of the struts painted in Interior Green. The division between it and the acetate sheet, as well as the struts themselves were rather indistinct, so it was difficult to precisely identify where to cut/paint.
Prior to mating the fuselage halves, I glued the interior splitter plates into place with cyanoacrylate. No significant amount of filler was needed, only a bit to make good the outer lip of the intake, which had fractured during the preparation of the resin components.
The jetpipe was painted in Humbrol 33 Matt Black initially, followed up by Humbrol 53 Gun Metal, then Metalcote Gun Metal. The lip and turbine bullet tip were burnished to suit.
4. Fuselage assembly.
With the bathtub installed, it was time to mate up the fuselage halves. This was a straightforward job, with by far the largest amount of work filling the opposite gap between the aft bathtub and the fuselage. I also made good the extreme nose, drilling a hole for the stubby proboscis that was installed ahead of the radome and cleaning up the contour. I also drilled a hole in the upper aft fuselage for the fin to mate to. The rods that were to support the horizontal flying surfaces were glued in place with 5-minute epoxy.
A rudimentary gunsight was added to the coaming, which had been painted in Humbrol 33 Matt Black in the meantime, as it seemed that one was fitted even though the guns were not. Then the ejection seat was installed, dropping in just as advertised.
Attaching the canopy was rather tricky, and I suspect that I left rather too much material on the base. Certainly a lot of Mr. Surfacer had to be used aft of the canopy to blend it in properly.
A bit of engraved detail on the aft fuselage, just above the jetpipe was added, as detailed in Rolls & Havill. There is what looks to be a large airbrake, and a number of small details beneath the central fuselage, but these are not at all represented in the kit. Which is not to be wondered at, as there seems to be no ventral view of the aircraft extant, from any stage in its career.
|
Click on
images below to see larger images
|
|
|
5. Wings
The wings are cast as single pieces of resin. Some large resin bubbles at the tips go through the entire thickness of the wing and these had to be made good. I also drilled locating holes for the main landing gear - substantially different to the F-86, so as to bear the F-93's significantly greater weight. This was quite tricky due to the thinness of the wing, and I managed to drill clear through both, which gave me problems later on in making good the surface. I don't know a good way of making a solid mount.
With the brass rods epoxied into the fuselage, it was straightforward to epoxy the wings to the fuselage and the bond seemed good. Minimal filler was needed and the mating of the outer and inner main gear bays seemed good.
6. Empennage
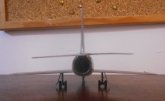
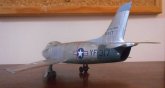
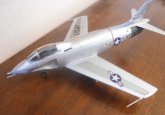
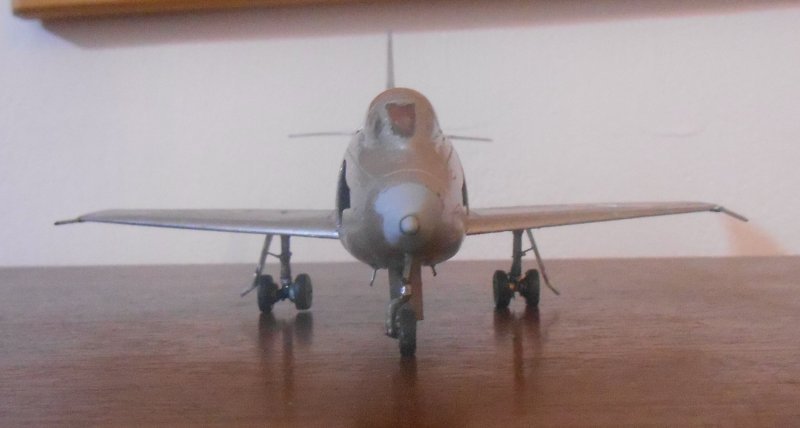
The fourth of the 'gotchas' concerning the differences between the F-93 and the rest of the Sabre family is the anhedral on the horizontal tailplanes, opposite to all F-86s, as can clearly be seen in a North American publicity photo of the F-93 and F-95 (as the F-86D was then designated). The tailplanes had a similar resin bubble problem at the tips as the mainplanes, but it was harder to fix given their significantly smaller thickness. Once it had been resolved, they were glued in place using epoxy.
The fin, complete with root extension (which snapped during preparation), had a rather ragged tip, which took substantial effort to make good with Mr. Surfacer and Milliput. Eventually it was, however, and the bulk attached to its brass locating pin with epoxy, the fragment of forward extension being glued in place with cyanoacrylate.
7. Undercarriage
I attempted to beef up the resin gear legs by drilling through them and inserting lengths of thin brass rod. I eventually managed it, but it was more of a case of attaching fragments of resin leg to the rod, as they all snapped under the work. Rubberised resin would have been immensely helpful here. As there was no real mounting for the mainwheels (two on each leg), I had to glue short lengths of brass rod to the ends of the legs.
I painted the gear bays in the same way as the cockpit interior. The doors were left aside to be painted at the same time as the main model, which was a bit pointless, as they were closed with the gear extended as per North American's general neat practice. I should have painted the inner faces, then glued them in place.
I painted the wheels and gear legs in Humbrol 56 Aluminium, picking out the oleos in Humbrol 11 Silver Fox. The tyres were painted with Xtracolour Tyre Black. A mix of Rowney brown and black inks, well thinned, was used to create a wash for the gear legs and wheels, prior to the latter colours being painted.
8. Final assemblies
There are two wingtip pitot probes included in the kit, with substantial resin lugs intended to fit into notches in the wingtips. This was very helpful, but it of course did not prevent their getting broken off during the later stages of painting. I added two small pitots just outboard of the nose gear bay from scrap plastic and rod, and another probe underneath the extreme nose, angled downwards.
To represent those mysterious protrusions under the central fuselage, I added two pieces of plastic scrap, identical port and starboard, forward and aft of the main gear bay, towards the outer edge of the ventral fuselage. There was insufficient information to hazard a representation of the airbrake, however.
9. Painting
I began the painting with Hycote grey acrylic primer, looking to fill any remaining defects. After these were resolved, I coated the model and gear doors in AK Interactive's Xtreme Metallic gloss black primer.
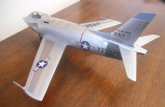
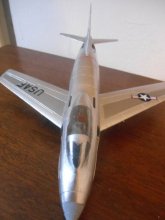
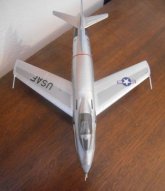
The aircraft was finished in natural metal overall, with the radome and aerial covers in a pale colour. The wing spar box covers were painted in a darker colour, and the extreme aft fuselage was darker still. I used the Xtreme Metallic Polished Aluminium for the main shade, Dark Aluminium for the spar box covers, upper and lower, and, after some trial and error, a mixture of Humbrol 53 Gun Metal, and Metalcote Gun Metal for the jetpipe region, which was a good enough hue, but came out rather flat.
Details are few, but there are some. I elected to use Humbrol 127 Grey for the radome and aerial covers at the leading edge of the fin root extension and the fincap. The mouths of the auxiliary intakes were picked out in Humbrol 33 Matt Black, as were the dorsal and ventral intake overspill slots. The turbine warning stripe was originally to be done in Humbrol 60 Red, but thinning this to spray dramatically changed the hue, to a ruddy orange, and I stripped it all off, to be replaced with a handpainted band of Miniatures Paints Red, which looked much better. The insides of the landing lights clustered ahead of the nose gear bay were painted in Humbrol 11 Silver Fox.
10. Markings
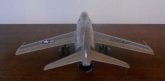
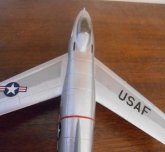
The markings are plain, merely the Stars and Bars in four positions, with the 'USAF' titling on the opposite wing surfaces, and the buzz number on the aft fuselage, along with the 'U.S. Air Force' titling on the fin, in a fairly discreet manner, and the last four digits of the serial number below, rather larger. I painted on two placards towards the jetpipe, representing them as white rectangles.
Having purchased the kit secondhand via eBay, I was not particularly surprised to find the decals missing. However, Arnold of Anigrand was perfectly helpful in supplying replacements, which went on well. The decals were painted over with Hannants Xtracolour Matt Varnish once they were fully dry and the model rinsed.
11. Final Assembly
There was little to add after decal application, only the landing gear, and the
bay doors. The legs were attached first, using epoxy, and then the doors glued in place with cyanoacrylate. There are two door extension struts on the main gear legs, and these were added from plastic card, having been painted in the same manner as the gear legs themselves, Once the outer doors were set, these were glued into place with cyanoacrylate. I have slight reservations about the model's sit angle, and the main wheels seem a little far apart, but one has to take what one can get in such circumstances.
12. References
-
1. Aviation Classics No.9: North American F-86 Sabre, ed. Tim Callaway and Duncan Curtis, Morton Media Group, 2011.
-
2. A Flight Comparison of a Submerged Inlet and a Scoop Inlet at Transonic Speeds, L. Stewart Rolls, NACA Research Memorandum RM A53A06, March 1953.
-
3. An Evaluation of Two Cooling-Air Ejectors in Flight at Transonic Speeds, L. Stewart Rolls & C. Dewey Havill, NACA Research Memorandum RM A54A05, March 1954.
-
4. Research and Development Contributions to Aviation Progress (RADCAP), Volume 1., J. G. Paulisick, NASA Contractor Report CR-129572, August 1972.
-
5. Memoirs of an Aeronautical Engineer: Flight Tests at Ames Research Center: 1940-1970, Monograph in Aerospace History Series#26, Seth B. Anderson, NASA Special Publication SP-2002-4526, 2002.
-
6. Atmosphere of Freedom: Sixty Years at the NASA Ames Research Center, Glenn E. Bugos, NASA Special Publication SP-4314.
-
7. Some Fighter Aircraft Trends, M. Leroy Spearman, NASA Technical Memorandum TM-86352, January 1985.
-
8. F-86 Sabre in Action, Lou Drendel, Squadron Signal Aircraft in Action Series 126.
-
9. X-Fighters: USAF Experimental and Prototype Fighters, XP-59 to YF-23, Steve Pace, Motorbooks International, 1991.
Gavin Parnaby
|
Click on
images below to see larger images
|
|
|
|