After my Ju 52 and Junkers G24 projects in Turkish markings were
completed, I started to look for a new model to build in Turkish markings.
And I wanted it to be a civilian aircraft with propellors and one which wasn't
ever built before. So, the idea of building the TuAF F.13 Limosine was there.
It seemed to be another tough project due to the lack of
documentation. But this time there was a bigger challenge such as
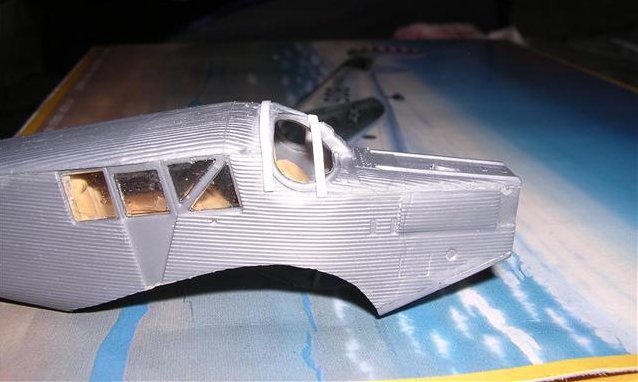
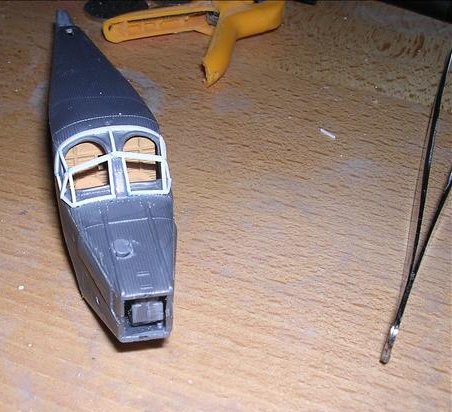
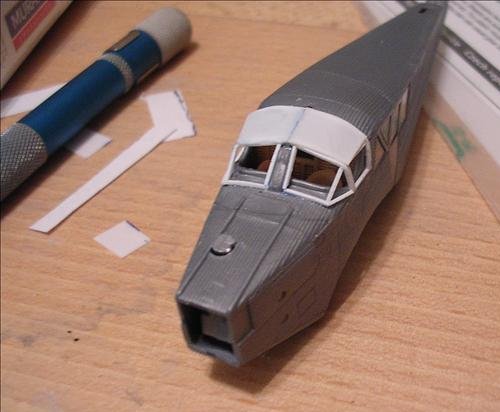
scratchbuilding a tail and a canopy section. Since the kit only provides
for an
open cockpit and a triangular vertical stab, which both had to be rebuilt for
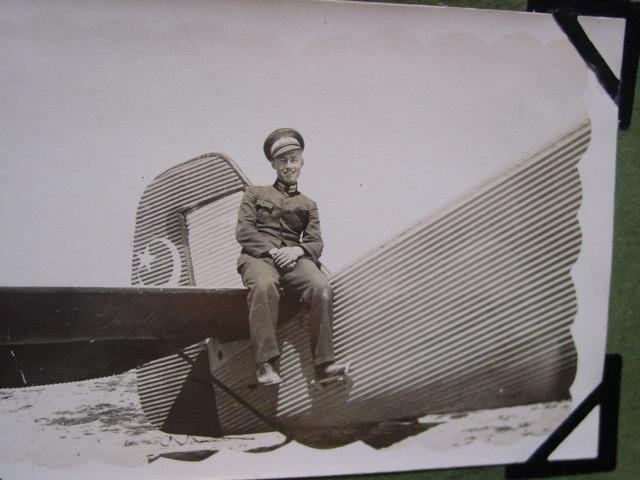
the Turkish "fe" version of the aircraft. But yet again the
"uneven surface" of the vertical stab. and the rudder was the biggest
problem, because it was very very hard to simulate in this scale.
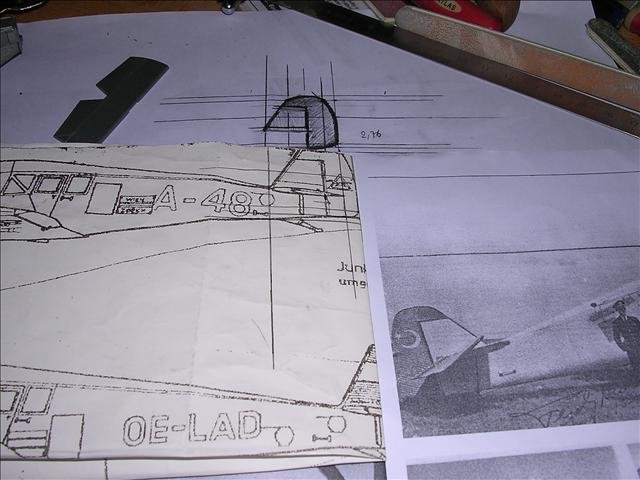
Although it wasn't clear to me how to scratchbuild the
tail part, I decided to start to build the model. It was October 1st and I
wanted the model to take part in the Aviation Museum of Istanbul's annual model
contest on October 16th. So, eitherway, I had to start first..
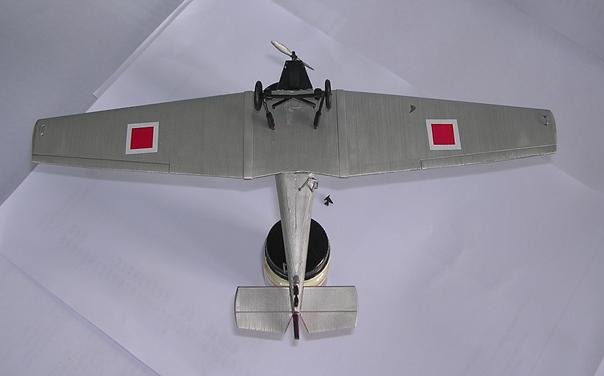
After an easy process of building the interior, I assembled the
fuselage and the wings separately. They were all ready in about 2 hours.
The kit provided no difficulties and no putty was used.
Now I had to choose to continue either with the canopy or the
tail. I knew how I should build the canopy, but still had no idea about the tail.
So, I chose to continue with the canopy, naturally.
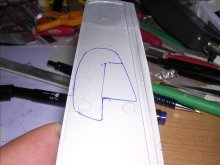
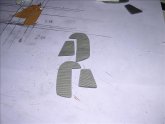
And the tough part was to face: The tail!!
I finally found the idea how to accomplish that, after I checked
many kitparts of many other kits, hoping to find something handy to build the
vertical stab and rudder. The answer was in the F.13's box. The lower wing part of
the kit itself was flat and had the same surface with the tail. So I decided to
cast and mold a resin copy of it. Since I already assembled my kits wings (and I
would need some wings to complete the plane as well) my dear friend, Tamer Ozkan,
was there to loan me the lower wing part of his F.13 kit. I'd like to thank him
a lot for sharing his hard-to-find kit with me.
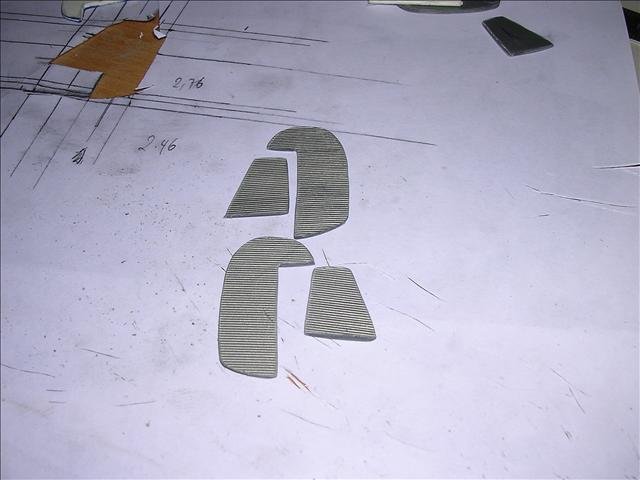
But the problem was still there. The resin copy of the wing wasn't the
best material to cut around. It had to be thin enough to be cut and sanded and
had to be strong enough to last until the end of the whole process. But a thin
resin sheet with bumps on it wasn't the one. So an easier way was to cut the
original kit part and so did I :)
|
Click on
images below to see larger images
|
|

|
 |
|
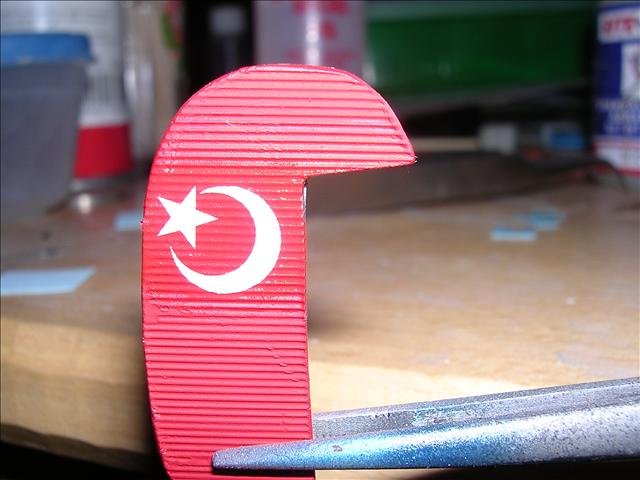
So the biggest problem of all was
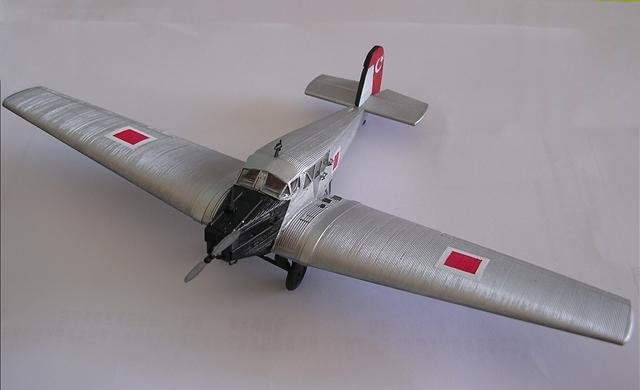
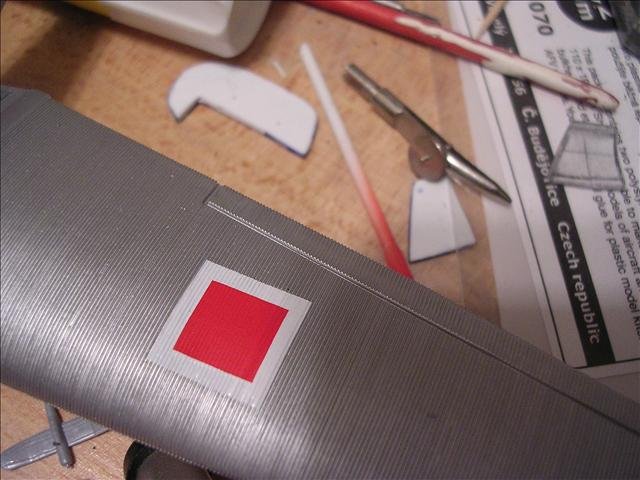
solved and now I could quickly assembly the plane. I painted the model with
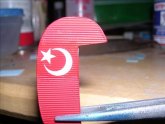
Tamiya's X-11 enamel silver and X-18 acrylic semi-gloss black.
I used the decals from www.turquoisedecals.com
and I have to say they are great. With the help of my former experiences I can
easily say that the surface of these Junkers models can be really tricky if you
are planning to apply some decals on them. But the ones from Turquoise Decals
were just a piece of cake. All I had to do is to choose proper crescent/star and
red-white squares from the sheet.
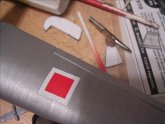
After everything was completed, I
used Microscale's Kristal Klear for the canopy windows and the model was
completed. Everything was finished in about 16-18 man-hours within 14 days. The
kit is very good and an oob version can be completed in a much shorter time.
I would like to thank to Mehmet
Sekercioglu (founder of PM Models), Tamer Ozkan, Ufuk Aydiner, Turhan
Gungor and Stuart Kline for great support they've provided during the project.
Tayfun
|
Click on
images below to see larger images
|
|
|
|
 |
 |