|
After a long break of almost 2
years of not building any aircraft, I decided I yearned for the challenge of
building aircraft kits again.
Hunting around for a relatively good quality yet reasonably cheap (in this part
of the world anyways) kit led me to the Tamiya range of aircraft kits. I chose
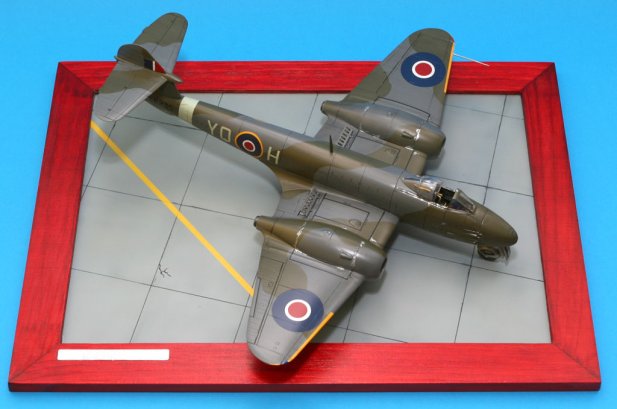
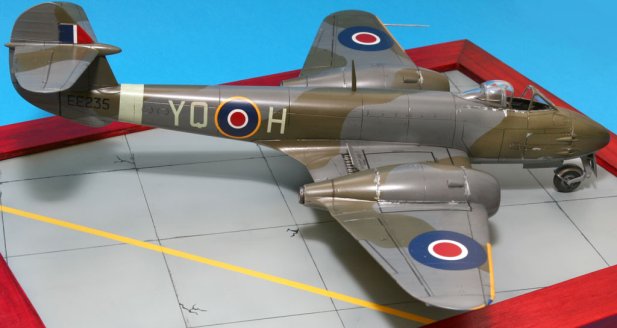
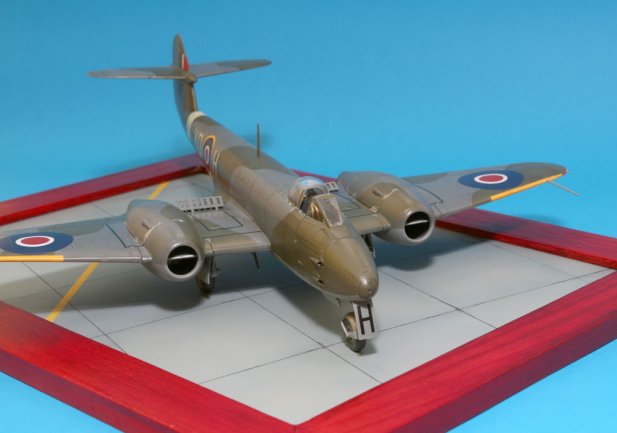
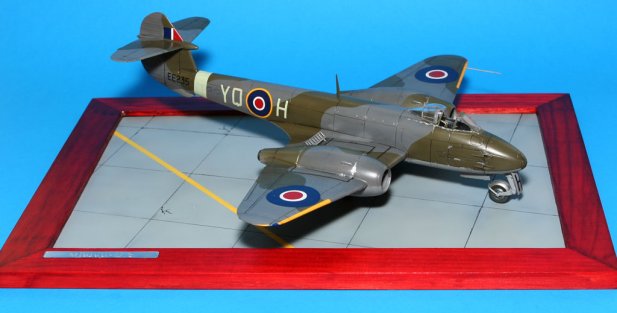
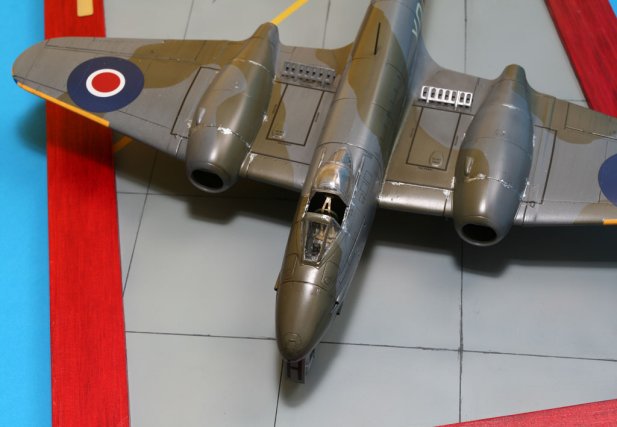
the Gloster Meteor F.3.
I initially bought this kit with
the intention of entering a local Tamiya contest here in Singapore, but other
personal distractions saw to it that this kit was completed slightly more than
a month late. I've always had a soft spot for British jets of the 50s, 60s and
even 70s. There's a certain ugliness about them that's appealing.
Anyways, the build wasn't easy due
to my hamfistedness, and certainly wasn't due to poor engineering on the part
of Tamiya. Many mistakes I made were of my own doing. If anything, the superb
engineering of the kit helped in alot of my repair work. After painting, gloss
coating and decalling, I discovered a cracked wing root joint, which was
repaired with white glue then sprayed over with the original colours before
darkening it some using Tamiya clear smoke.
Click on
images below to see larger images
Eduard PE parts for
the cockpit were used. It's the first time I'm using PE parts for aircraft and
"it's a challenge" would be an understatement even though it was only
the Zoom set that I've used. Still I liked the results enough to want to use PE
parts for my cockpits in future.
Pictures of Meteors
seen in my references showed a rather clean machine, so I didn't go to town with
the weathering. Initially, the cannon ports were to be weathered with soot, but
not one picture I saw had the gun ports dirty, so these were left clean, opting
only to do chipping to that area, oft accessed panels and the canopy sills.
The base used was a
picture frame from Ikea, stained cherry red and then coated with 2 coats of matt
quick-drying varnish. I scribed a grid of 6cm for the tarmac, sprayed it with
concrete coloured grey before washing the scribed lines with a dark custom mixed
grey of Vallejo paints. Some cracks were painted on freehand. For the yellow
line, I felt it helped break the monotony of the grey area so decided to mask
off that area and spray a yellow mixed with some white Mr Surfacer to tone it
down.
I used the nameplate
of the Eduard PE set as I felt it was quite a nice touch. It was first coated
with gloss black then sprayed with Alclad Polished Aluminium before being buffed
with a soft cloth. Time to expand my Alclad range me thinks.
Gareth
|