|
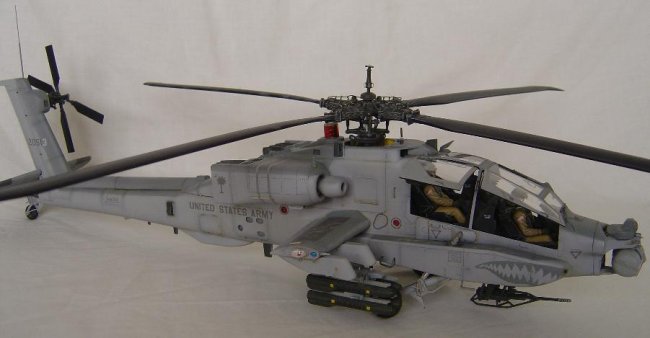
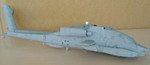
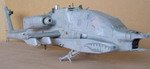
Here are some
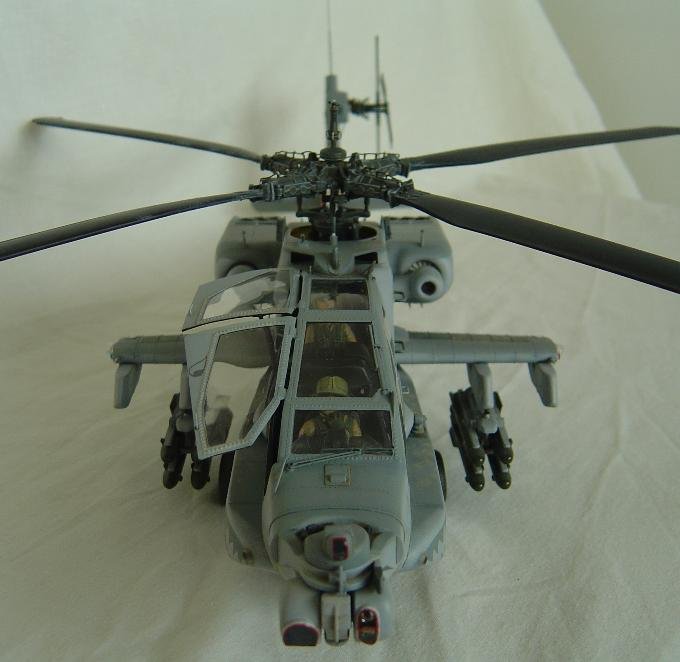
pictures of my most recent build, a Revell 1/32 AH-64A finished in the
colours of the South Carolina National Guard. Regular visitors to the
ARC forums may already be familiar with this particular model, however
those that haven't seen it, I
hope you like it.
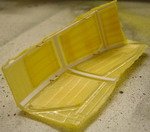
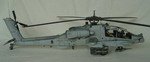
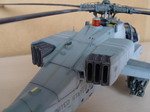
I love building
extra details into my models and this was no exception. On the main
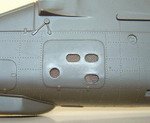
fuselage I added some wire mesh to simulate the grilles under
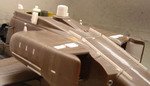
the right engine nacelle. The nacelles themselves were detailed using
styrene strip and foil tape. The engines exhausts were removed completely
to be replaced with scratch built versions made from styrene sheet and
mesh.
Click on
images below to see larger images
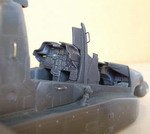
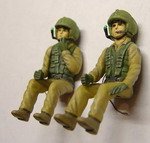
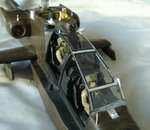
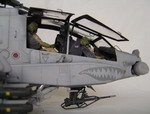
Before adding
the canopy I had to complete the two crew figures. I removed the
moulded helmet monocles and replaced them with scratch built items again
using styrene and twisted copper wire. The monocle eye glass itself
was made using a tiny piece of clear styrene painted with Tamiya clear
green. I also incorporated a small piece of clear styrene to
simulate the visors which was painted with Tamiya smoke. I detailed
the inside of the canopy frame with styrene strip and brass wire before
painting it.
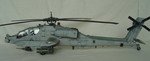
With the
canopy added and masked I gave the whole thing its first coat of paint to
act as a primer. This was necessary to allow me to preshade before
airbrushing the main colours. I used an approximate 50/50 mix of
Tamiya sky grey and white (with a tiny drop of blue) for the lighter
of the two greys, and a mix of dark sea grey, light sea grey and white for
the darker upper surfaces.
After the
paint was dried a gloss coat was oversprayed and decals added. I
made most of the decals myself using an ordinary inkjet printer. The
sharkmouth was masked up and sprayed using the same grey mix as for the
upper surfaces. The first lot of weathering was done using artists
oils, mixing yellow ochre and burnt umber and then washed around the main
panel lines and edges.
Once everything was flat
coated and dried the canopy was unmasked in readiness for the final stages.
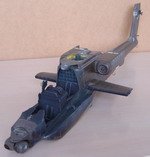
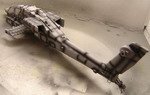
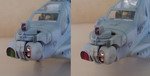
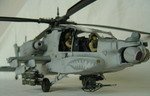
The TADS/PNVS turret was detailed using a small piece of a DVD-R disc sanded to
shape. The slightly holographic shine of the disc gave a quite convincing
effect. The 30mm cannon was detailed with styrene rod to create the wire
strike framework, and also with wires and photo etch ammo chutes from the
Eduard set. The final few parts and details were finished and some
last minute weathering with pastels to simulate dusty footprints on the
sponsons was added.
Big thanks to all the
guys on the forums who helped me along the way with this build providing me with
extremely useful photos and info. Cheers.
Paul
Click on
images below to see larger images
|