|
A PHANTOM II again, sorry
but I just can't help it. It is time again to say good bye to a good
friend and fellow pilot of my squadron. He is going to transition to the EUROFIGHTER,
and since he always bugged me to build him a model, I figured it would be
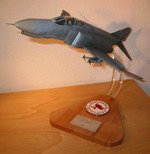
a good idea to present him one during his farewell ceremony. My goal was to
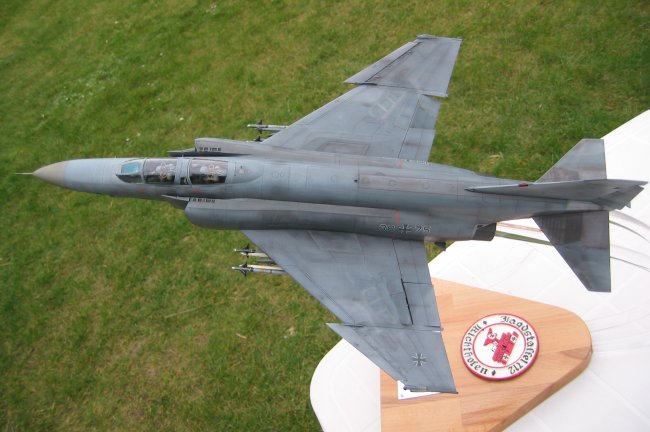
depict a typical dirty FW-71 "Richthofen" based jet in Flight
Click on
images below to see larger images
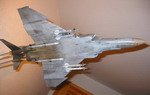
It is the well
known REVELL 1/32 scale F-4F kit. It has it's well known deficiencies, but
since I chose to depict it inflight, there were not too many
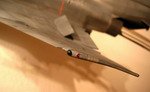
modifications to be done. Of course the radome was shortened and brought
in the right shape (actually the complete nose section in front of the
canopy and the canopy itself is shaped wrongly, but that is not noticed at
first glance), with that the gun muzzle had to be shortened for the same
amount. The Intake trunks were shortened about 3.5 mm, the grills on top
and bottom of the intake are actually from the TAMYIA F-4C/D.(a leftover
from times when I cut them out to fit them on an own REVELL F-4, later I
figured it is less work to just attach the whole intakes from TAMYIA to
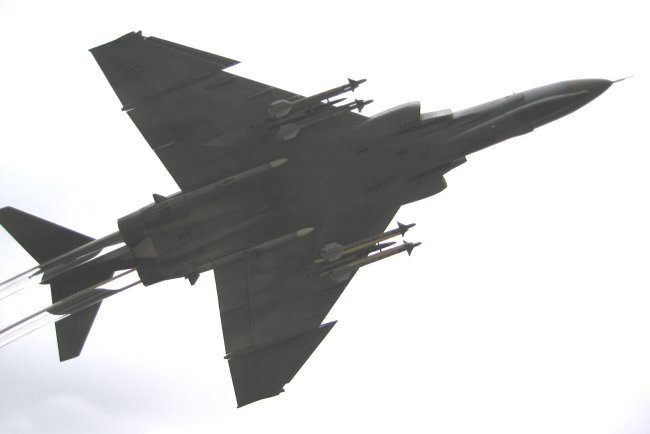
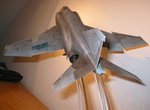
the REVELL F-4). All control surfaces were displaced to show the mighty
RHINO in a left hand climbing turn. The left spoiler was cut out and
the interior scratchbuilt. The left aileron is displaced a little bit
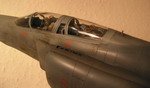
upwards, which is normal on the F-4. The Cockpit received some minor
mods.
It is about 5 mm too deep (which is the same on all F-4 kit I have built
so far (talking about the HASE and REVELL 1/72 scale kits).
The crew is
from TAMYIA, their poses where adjusted to have the pilot hold the stick (which is displaced left aft, I know, that is geek like...) and
throttle and the WSO having his hands on the ALE-40 controls and grabbing
a grip, since it is supposed to be a visual engagement.
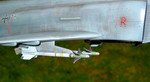
The centerline tank is already jettisoned since only the
attachment below the rear lower fuselage is left. Armament consists of 4 AIM-9Li
and 2 AIM-120B. While the kit Winders are pretty good the Slammers are totally
wrong both in lenght and shape. They are about 10mm too long like the missile
bays on the jets fuselage, but I did not have time to shorten the AMRAAM bays, so
I just left them too long as well and readjusted the front wings of the missile a
little bit forward, so they weren't over the speedbrakes, plus I sanded the thick
part of the missile body to match the rest of the missile)
For all the lights I used 2 component epoxy glue mixed with
the color of the light (or in case of the AIM-9s with some light grey, which
gives the perfect look for the seekerheads). This glue perfectly sets in all
positions you like to by it's own. All you have to do is put some gloss clear
over it once it is dry since it stays a little bit sticky and attracts dust.
For the paint I used REVELL
enamels which where rubbed over with pastels after only one day of drying,
to get the weathered effect.
All weathering was done with
pastels except for the streaks on the aft part of the lower fuselage.
The dark grey lines on the
fuselage are done with pencil and depict the marks of the maintainance crews
boot a very common sight on German F-4's
Decals are from AirDoc. I
have to say, that I am quite disappointed. They are quite complete very crisp
and to my knowledge the only ones to
depict a Norm90J F-4. But all the grey stecilling is way to light,´a mixture
between dark and light ghost grey, while on the real jets they are more like
gunship grey. So they are very hard to see, that's why I chose to paint the
walkways and the darkgrey lines of their edges as well. The little no step
footmarks where taken from the Kit.
Another happening I had was, that
espesially the small stencils just did not stick, even though I used decal set
and decal sol.
Finally the jet was placed on 15
mm diameter acrylrods, which were pretty hard to find. To bend them around I
just put them in the kitchen oven for 15 min at 160° Centgrade. They got soft
like dough - easy going, thought that would would be the hard part.
Our squadron badge is casted.
Thats it, hope you like it.
SCOUT
Click on
images below to see larger images
|