|
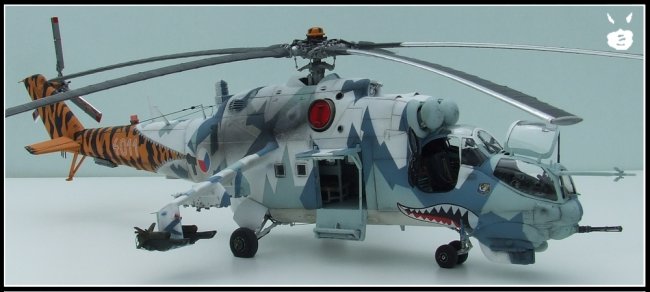
For once,
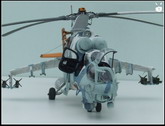
something not with French roundels, but as we had chosen to make an helicopter
GB on the Fighter forum, let’s go for something different. The Hind looks
great, in particular in this Czech tiger paint scheme.
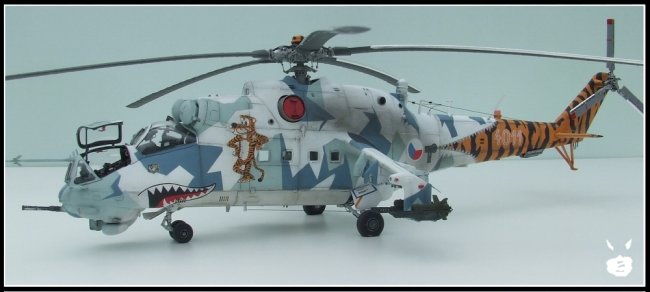
The Revell (ex
Monongram) kit is pretty good and, if you wish to mount it straight from the box
you will obtain an impressive 35 cms model. But what I like with
helicopters is that you do have plenty of details to scratch, so let’s go to
“enhance” this kit without any detail kit.
-
Image
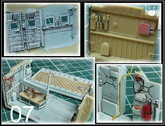
01: seats are maybe correct for mountain trolls, but not for a human pilot,
they are much too large. As they are molded with the unique cockpit part,
all this is cut and seats are scratched
-
Image
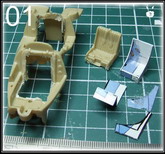
02: seats are designed using an eraser and scotch aluminium.
-
Image
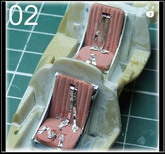
03: cockpit layout is completely false and is to be recreated
-
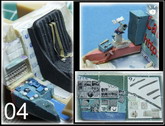
Image
04: all details are then scratched with all possible things: electrical
wire, eraser, paper, etc…
Click on
images below to see larger images
-
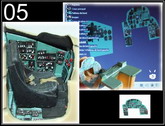
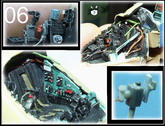
Image
05 and 06: and so on to fulfil this cockpit
-
Image
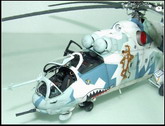
07: Whereas the cockpit is completely false, the cargo zone is accurate. I
just added a fire extinguisher and some tubing. All this is painted in light
blue
-
Image
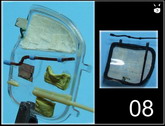
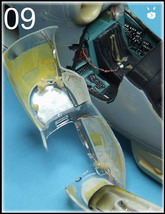
08 and 09: time now to prepare transparent parts. Take care not to confuse
between Hnd D and F. On the D type HUD is fixed on the canopy. Note that the
mirror has disappeared on the final photos, as I walked on this door, I did
forget, when recreating it, to recreatd the mirror.
Click on
images below to see larger images
-
Image
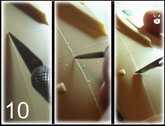
10: of course the kit has been completely re-engraved
-
Image
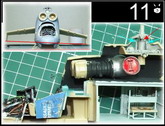
11: Take care when closing the fuselage, if you watch to all these photos
you will see that nothing is straight on a Hind. If you want something
realistic, looking from the front, the fuselage should lean on the left.
http://www.airliners.net/photo/Czech-Republic--/Mil-Mi-35/1305301/L/
http://www.airliners.net/photo/Bulgaria---Air/Mil-Mi-24V/1300158/L/
http://cdn-www.airliners.net/photos/photos/9/7/9/1268979.jpg
http://www.airliners.net/photo/Czech-Republic--/Mil-Mi-24V/1218046/L/
-
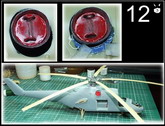
Image
12: some few problems. The engine exhaust are empty, to hide this I
scratched masks that are also giving a color touch. Small problem, the
blades are to be bended. Bigger problem, the holes for the engine exhaust
are of the wrong shape and are to be filled on their bottom.
Click on
images below to see larger images
-
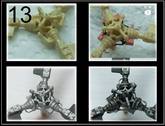
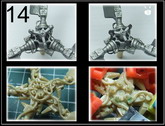
Image 13 and 14: rear rotor is pretty fine but can be easily
enhanced. I discovered at the very end that its diameter is 1 cm too big,
it’s touching the main rotor and the rear stabilizer, but visually it does
not change anything. Main rotor is pretty fine but false for some details.
-
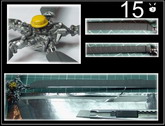
Image
15: then you just have to paint and dry brush all this.
-
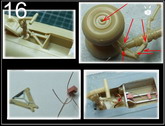
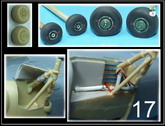
Image
16 and 17: landing gear are to be detailed, the most visible thing being the
front wheels to dig.
Click on
images below to see larger images
-
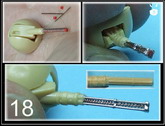
Image
18: machine gun is particularly visible on the Hind and I recreated it using
pins, aluminium scotch and electrical wire.
-
Image
19: weapons pilons are enhanced with various details.
-
Image
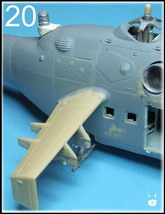
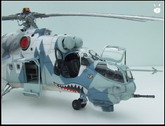
20: at this stage I did create the device at the top rear of the fuselage
(infrared dispersal device or something like that) and suppressed the kit
windows too thick. This device appears on late D Hind type.
Click on
images below to see larger images
-
Image
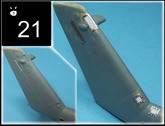
21: tail grids are redesigned and added if missing (a small one is still
missing on this picture)
-
Image
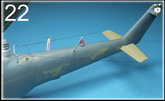
22: Antennas on the tail are completely false in the kit and have, for this
late D, to be recreated in this way
-
Image
23: Another thing to scratch, the flare features.
-
Image
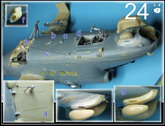
24: bottom of the fuselage, a set of corrections is to be applied
-
a-b-c-d:
different antennas and engraving
-
e:
wire antenna
-
f:
intake to be hollowed
-
g:
connection between front antenna and fuselage has to be redesigned, and foot
step to be recreated
Click on
images below to see larger images
-
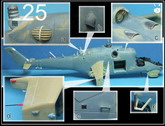
Image
25:
-
a: this exhaust is to be hollowed to look more real
-
b: exhaust to be redesigned, it’s flat on the kit
-
c: air intake have been recreated, and the turbine cone has
been drilled.
-
d: lights lay out has been reviewed
-
e: added handle and a small exhaust trap door
-
f: one branch of the foot step to be added
-
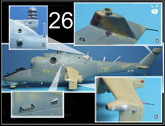
Image
26: same work on the left side
Now it’s paint time:
-
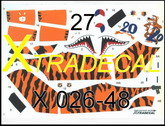
Image
27: The Xtradecal transfer sheet is fine, but no way tu use this uge
transfers on my kit, everything will be painted.
-
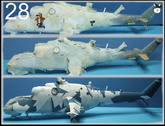
Image
28: kit is first painted in white, the masked, then light blue (Humbrol 66 +
Humbrol 130), then mask, then blue (Life Color UA141 and Tamiya Royal blue
X-3
Click on
images below to see larger images
-
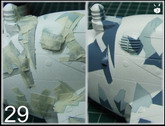
Image
29: then again masking to apply again some white to correct all little
defaults
-
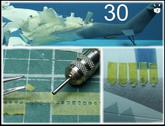
Image
30: for the tail, first I have painted in aluminium and then applied masks
to create the zipper
-
Image
31: then it is painted in black, masked and then in orange (Humbrol 154 and
81)
-
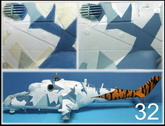
Image
32: at this stage, the blue color did not please me, so I masked again
everything to paint it again.
Click on
images below to see larger images
-
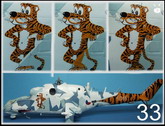
Image
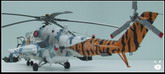
33: regarding the tiger, I had, on this paint scheme, to suppress the number
20. So I did cut he transfer, filled the holes with orange transfer, and
then painted manually the zebra scheme
-
Image
34: Now disaster time: I did create the exhaust traces using tamiya smoke
paint, and then used the matt Pebeo varnish. Waking up in the morning I
discovered that the varnish did crack the smoke paint, causing an horrible
effect. After a moment hesitating to through the kit in the waste basket, I
decided to paint again this zone. Supposing I did not waited enough between
the smoke and the varnish, I used a lighter smoke layer, waited 24 hours and
then varnished. Again the same problem, but this time quite invisible. I did
compensate it by applying another light smoke layer, so at the end the
exhaust traces are a little bit too dark, but not that much. The rest of the
weathering was done with pastel powder.
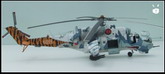
And here it is
at the end. I did suffer quite a lot, I don’t know how many meters of masking
tape I have used, but despite all small faults that do exist it does please me.
Laurent
Click on
images below to see larger images
|
|